You can click below to watch the full installation and programming video for The Attendant: There will be some differences on setup and capabilities between The Attendant and The Attendant Mini.
Download the App and Register a New Account
Download the free Poolside Attendant app and press ‘Register’ to create a new user account by following the prompts.
For detailed instructions on account creation, click HERE to view the article on Creating Your Poolside Account for the Mobile App.


Power On and Connect
After creating your account, power on The Attendant. On the app screen, you’ll be prompted with the question, ‘Which Attendant model will you be connecting?’ Tap ‘Select’ on the tile labeled Mini, then follow the on-screen instructions to connect the device to the internet.
Once the device is registered and connected to the internet, it will prompt you with the Welcome screen and which option to set up The Attendant Mini. We recommend using the “Interview” process.
Personalize Using the Interview
PERSONALIZE The Attendant by completing the interview.
The Interview feature allows you to set up the basic framework for your pool’s design.
Open the mobile app and tap the “Interview” button. You will be asked several questions; simply tap the options that best describe your configuration:
- Do you have a pool, spa, or both?
- How much water is in the bodies of water?
- Is there a spillover connecting the spa and pool?
- Does your spa share plumbing with the pool using actuators?
- Select the manufacturer of your equipment.
- Select the model of your pool pump and its wiring location.
- Is there a pool heater installed?
- Is there a salt chlorinator installed?
- Is a pH probe installed?
- Is an ORP probe installed?
- Do you have lights installed in the pool?
- Does your pool have any water features?
- Is there a cover installed for the pool?
- Do you have a pressure-side pool cleaner?
- Do you have lights installed in the spa?
- Is there a blower installed for the spa?
Note: Depending on your previous answers, not all questions may be displayed.
Once the interview process is complete, click “Next.”
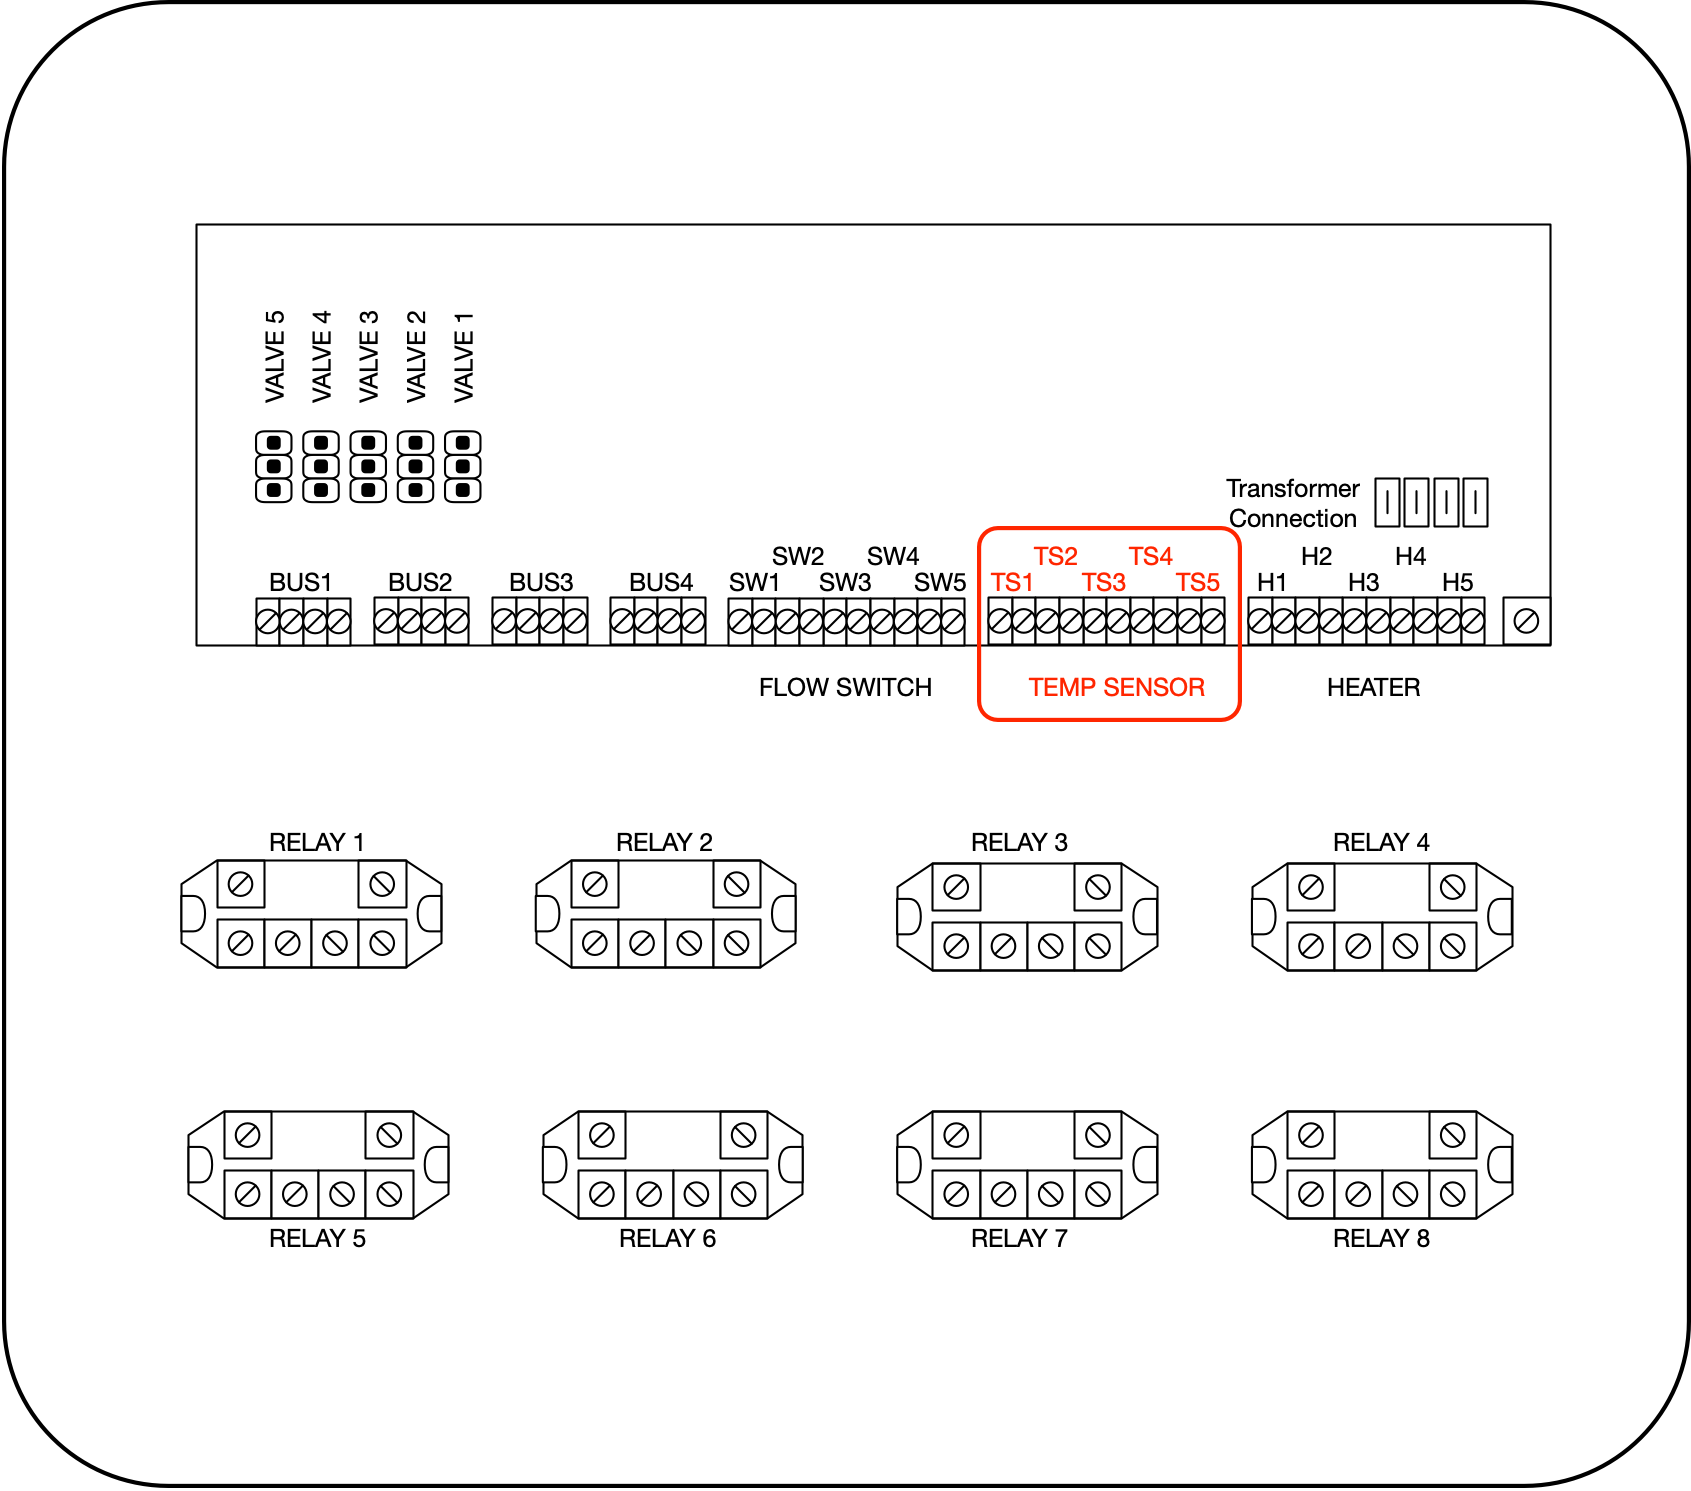
You’ll see the Interview Summary. It’s advisable to take a screenshot of this summary and connect your thermistors and actuators to the default listed ports. You can always adjust these settings later in Installer Mode.
Click “Next” and then “Finish.”
This completes the interview process!
Configuring Devices in Installer Mode
After finishing the interview, you will automatically enter Installer Mode, which closely resembles Service Mode in other automation systems. Your primary filter flow will be generated. You can now create additional flows or add equipment not included in the interview.
On the screen, you will see the following tabs: Site, Devices, and Flows. Tap on the Devices tab.
Edit devices by tapping the “>” symbol next to the device name, then select the brand, model, and physical connection for each device on The Attendant.
To add devices, tap the “+” symbol at the bottom center of the screen, select the device type and location. After adding a device, you can incorporate it into the flow.
If your specific brand or model is not listed, choose the one most similar or select a generic option for that device type. Don’t forget to press Apply and Save after making changes.
After saving your settings, a message will confirm the configuration is being saved. If successful, you will see “Config saved and downloaded to the Attendant.”
Next, you will have the option to set up filter pump schedules. You can choose to set them up now or do it later.
Press the “<” button in the upper-left corner and move the slider bar to exit Installer Mode.
Your configuration is now complete!
Other Links
To transfer ownership over to the homeowner, click HERE to view the article on “How to transfer ownership”
To set schedules, click HERE to view the video on setting schedules and scheduling functions.
Want to change the Maintainer on the account? Click HERE for the full article on “How to Add, Remove, or Become a Maintainer”.