
Please refer to the Glacier Chiller Manual for proper plumbing and wiring instructions.
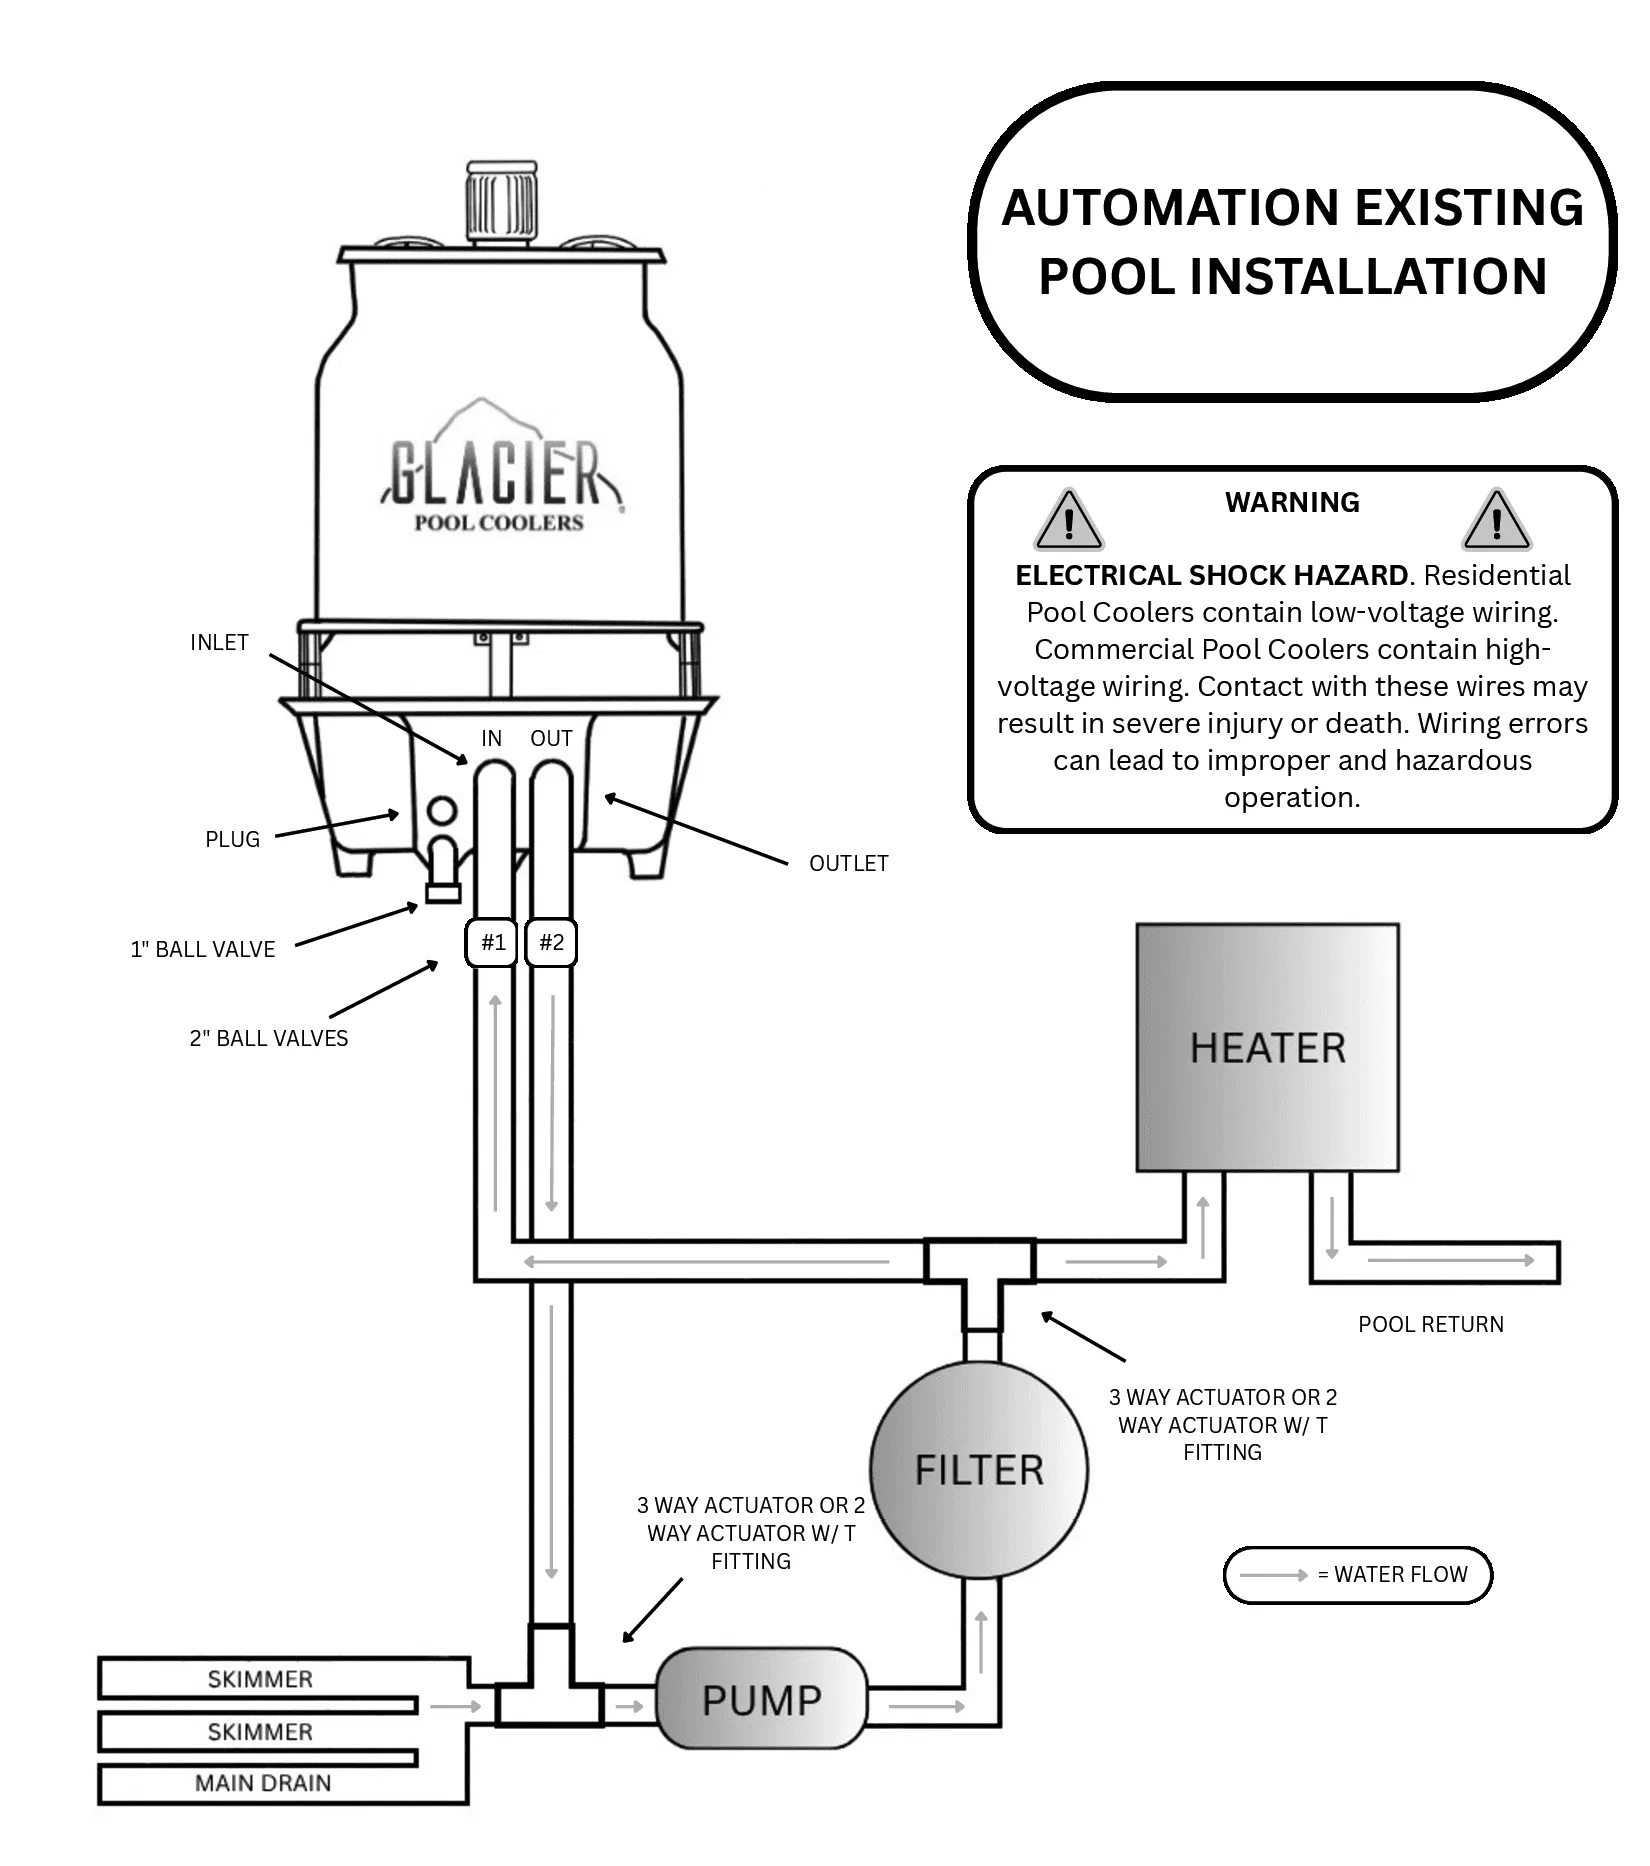
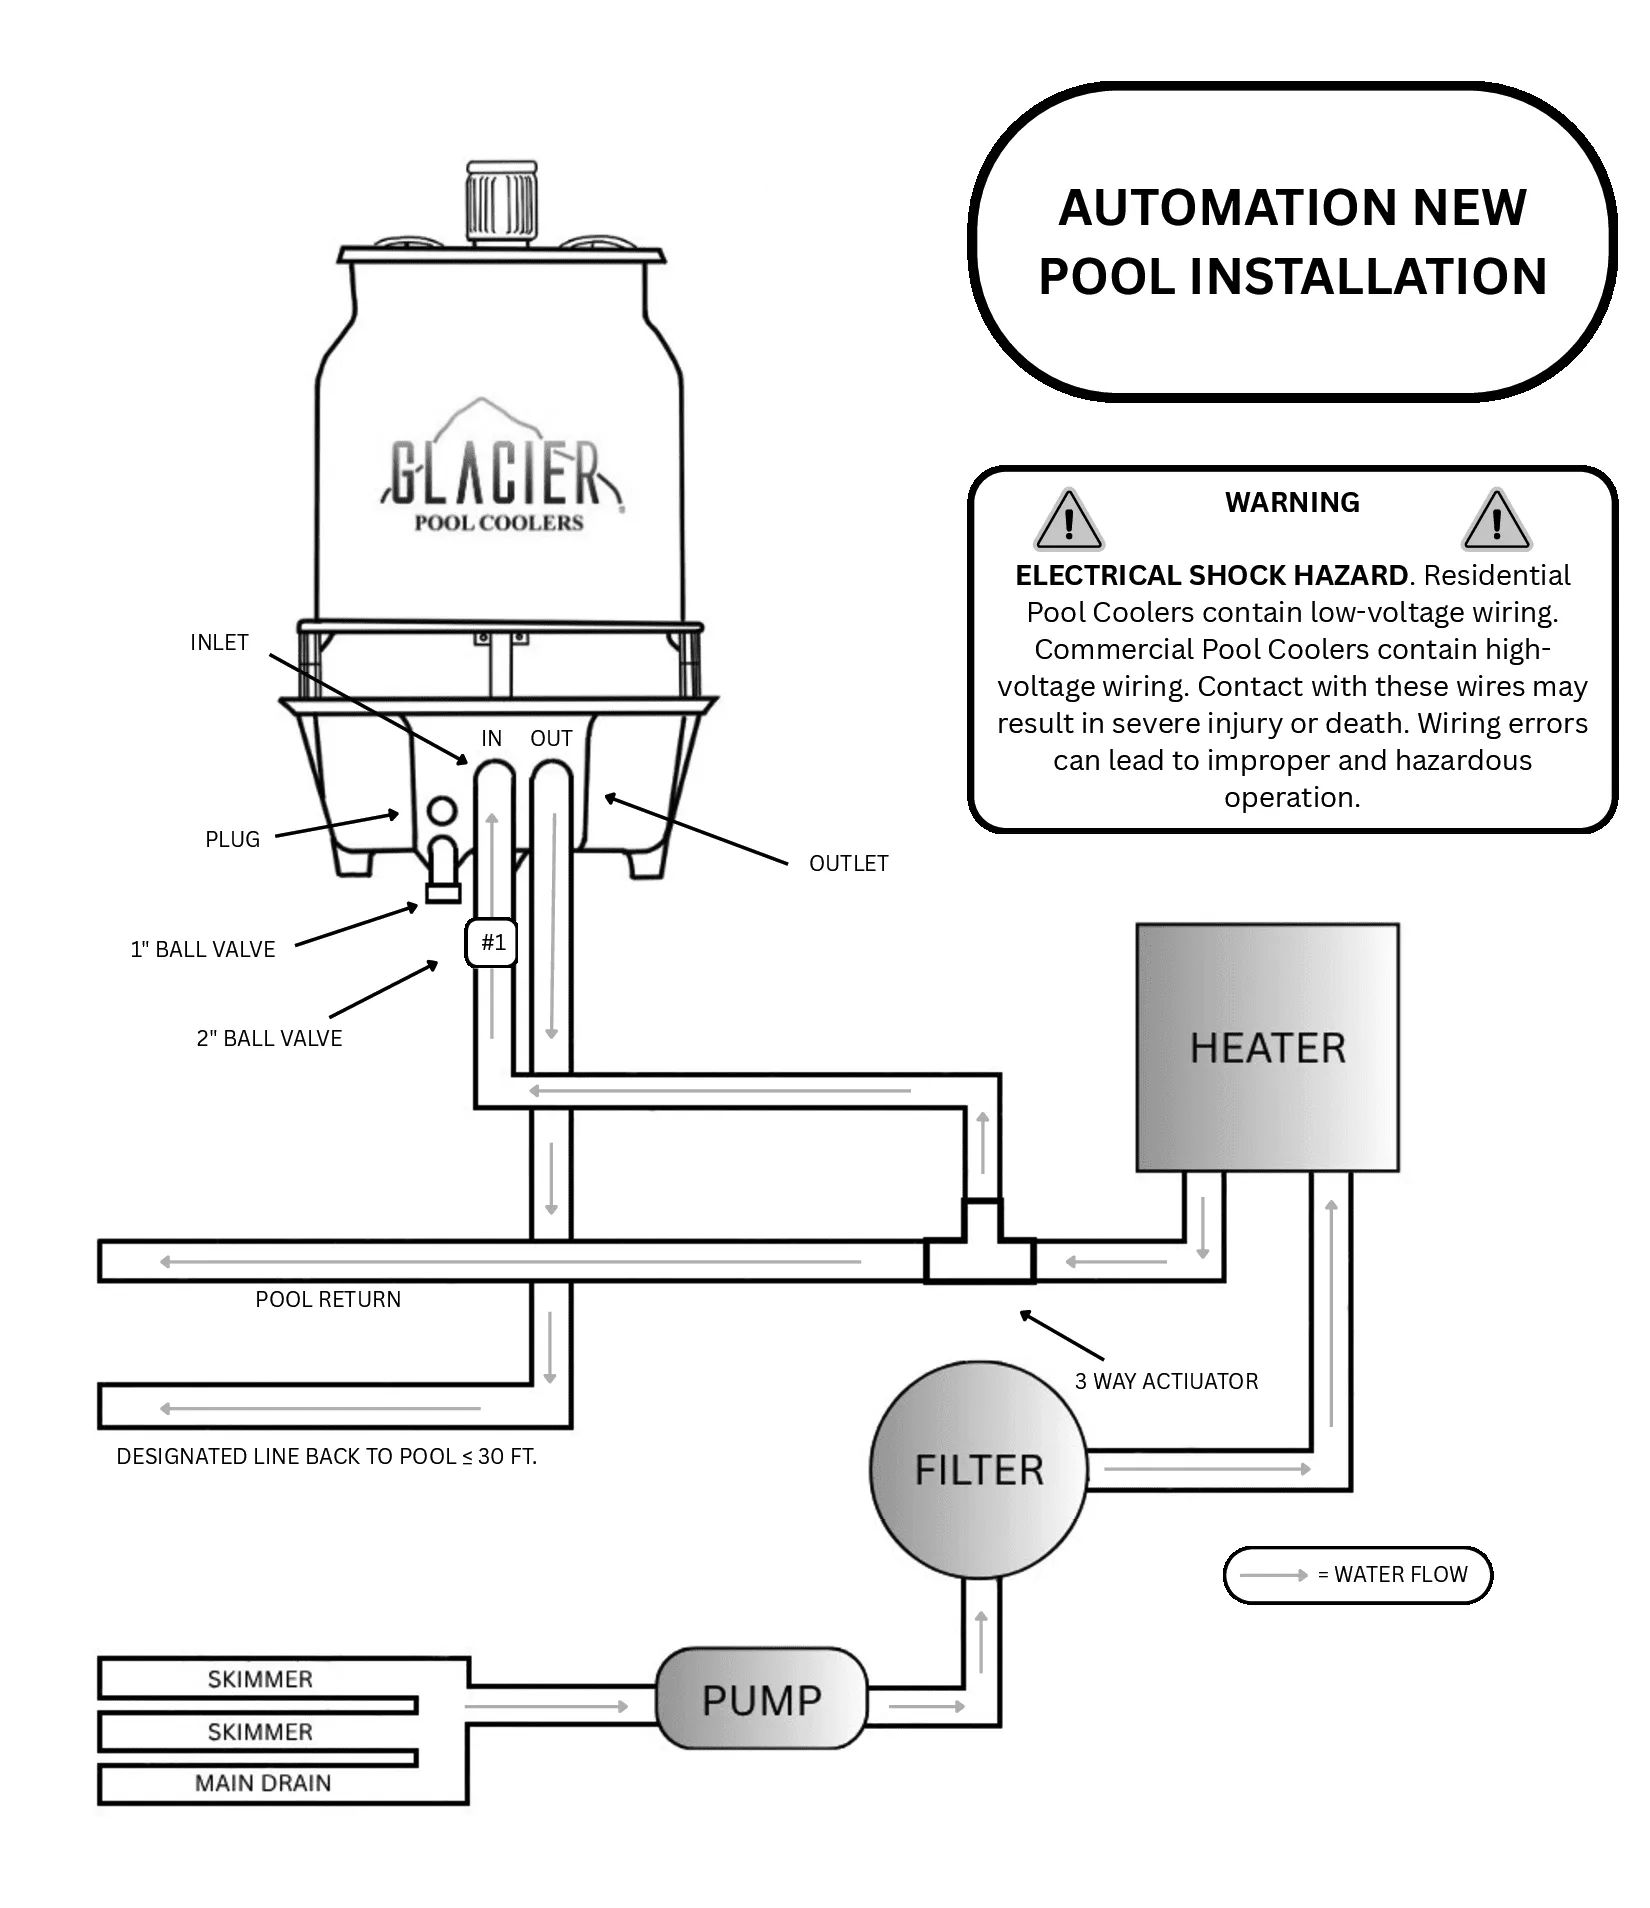
How to set up the Glacier Chiller in The Attendant
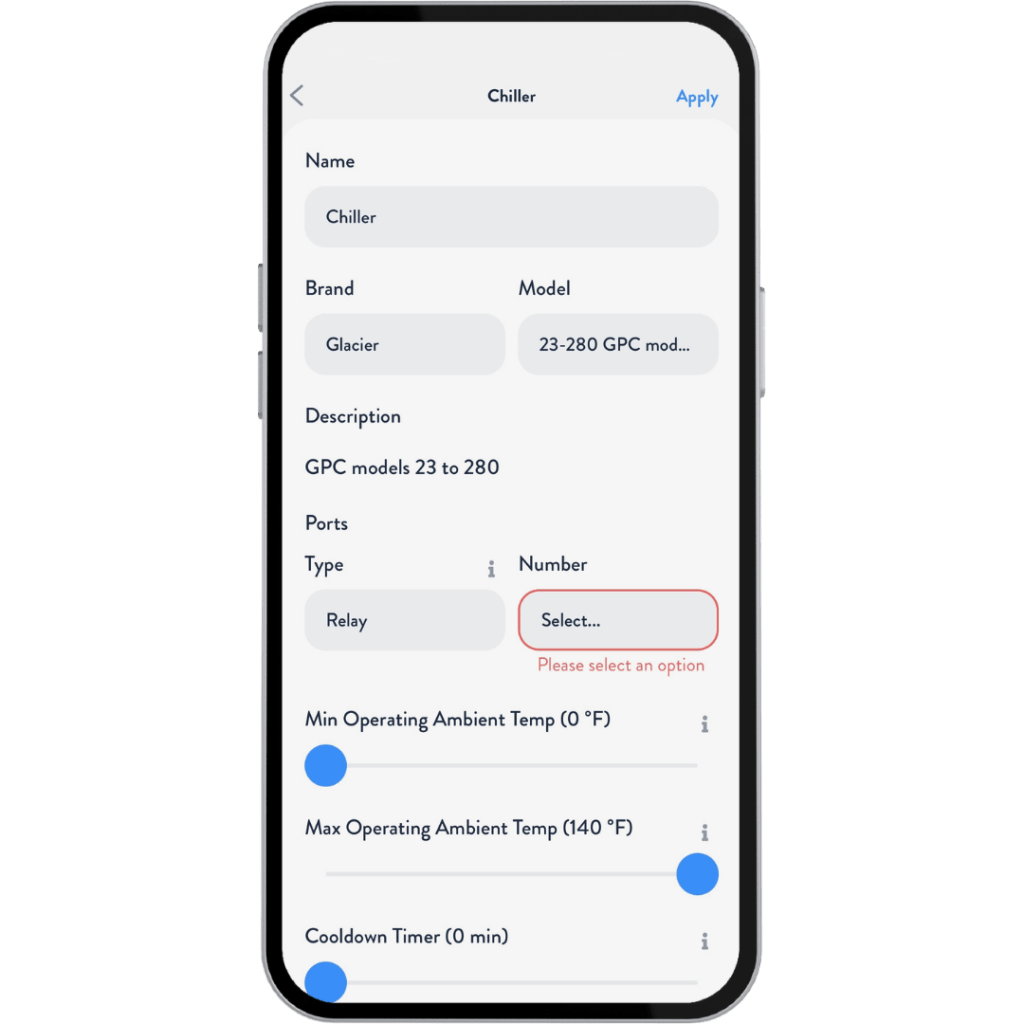
Once in installer mode, go to the Devices tab and press the + button. From the Add Device screen, select Chiller.

Select Glacier as the brand. Set the Port Type to Relay, then select the Relay that the Glacier Chiller is wired to. Press Apply, then Save.
Step 1: From the Devices tab, tap the + button. On the Add Device screen, select Actuator 3-Way.
Step 2: Rename the actuator to Glacier Inlet Actuator. If desired, update the Brand and Model, then select the Valve Port Number that the actuator is connected to. Press Apply, then Save.
Note: If the Glacier Chiller is installed on a dedicated return line, only the Glacier Inlet Actuator is required. Skip to Step 7.
Step 3: Return to the Devices tab, tap the + button, and select Actuator 3-Way.
Step 4: Rename the actuator to Glacier Outlet Actuator. If desired, update the Brand and Model, then select the Valve Port Number that the actuator is connected to. Press Apply, then Save.
Step 5: From the Devices tab, tap the > next to Glacier Inlet Actuator, then open the Advanced tab.
Step 6: Under Interlocked Actuator, tap Select, choose Glacier Outlet Actuator, then press Apply, followed by Save.

Step 7: Navigate to the Flows tab. Select the flow where the Glacier Chiller is installed, then tap Edit.
Step 8: Tap the + where the Glacier Inlet Actuator is located, then select Glacier Inlet Actuator from the Existing Devices list.
Step 9: Tap the + where the Glacier Outlet Actuator is located. Scroll down to New Devices, select T Split, then press Apply.
Step 10: Tap the unattached + next to Glacier Inlet Actuator, then select the Chiller.

Step 11: Tap the Chiller, scroll down to Connect To, then tap None and select T Split. Press Apply to return to the previous screen, then press Apply again, followed by Save. Your flow chart should look similar to the image below.
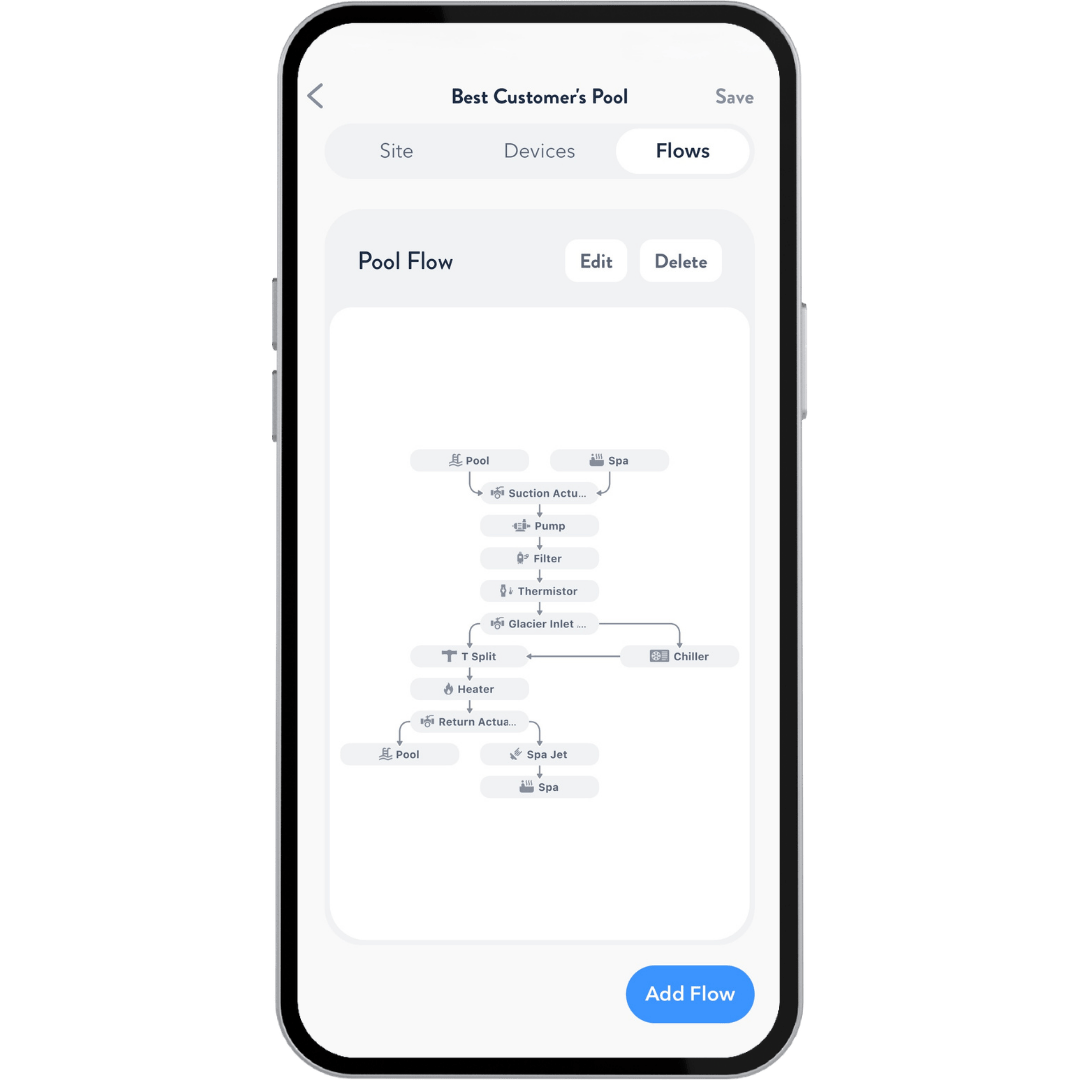
Your Glacier Chiller is now configured and ready for operation.
To change the operating mode, tap the ⋮ (more options) menu next to Temp on the app’s main screen. Select Heat, Cool, or Auto, depending on your installation and the equipment configured on your system.