Models 206A, 266A, 336A, and 406A
Remote Wiring Connections
Turn on the power to the heater.
Push the MODE key to select “POOL” mode and set the temperature to the highest safe setting available on the control. The actual set point will be controlled by The Attendant.
Turn the MODE button to “OFF” and remove power from the heater and The Attendant.
On the Raypak remote control harness, connect the BLUE wire “Common 24V” and the BLACK/ORANGE wire for “POOL” operation to an open heater port on The Attendant.

Attach wire nut on the unused wire (ORANGE/BLACK) spa wire.

Install the “7-Pin Remote Interface Harness” to the P8 connector and turn power “ON” to the heater and The Attendant.
Set heat mode to OFF on touch pad. Press UP and DOWN buttons simultaneously for 3 to 5 seconds until REMOTE displays on LCD. (This will ENABLE remote operation and DISABLE the arrow keys and MODE button.)
Programming
Once in installer mode, go to the Devices tab and press the + button. From the Add Device screen, select Heater.

Rename the heater, then choose Raypak as the brand and select the applicable model number.
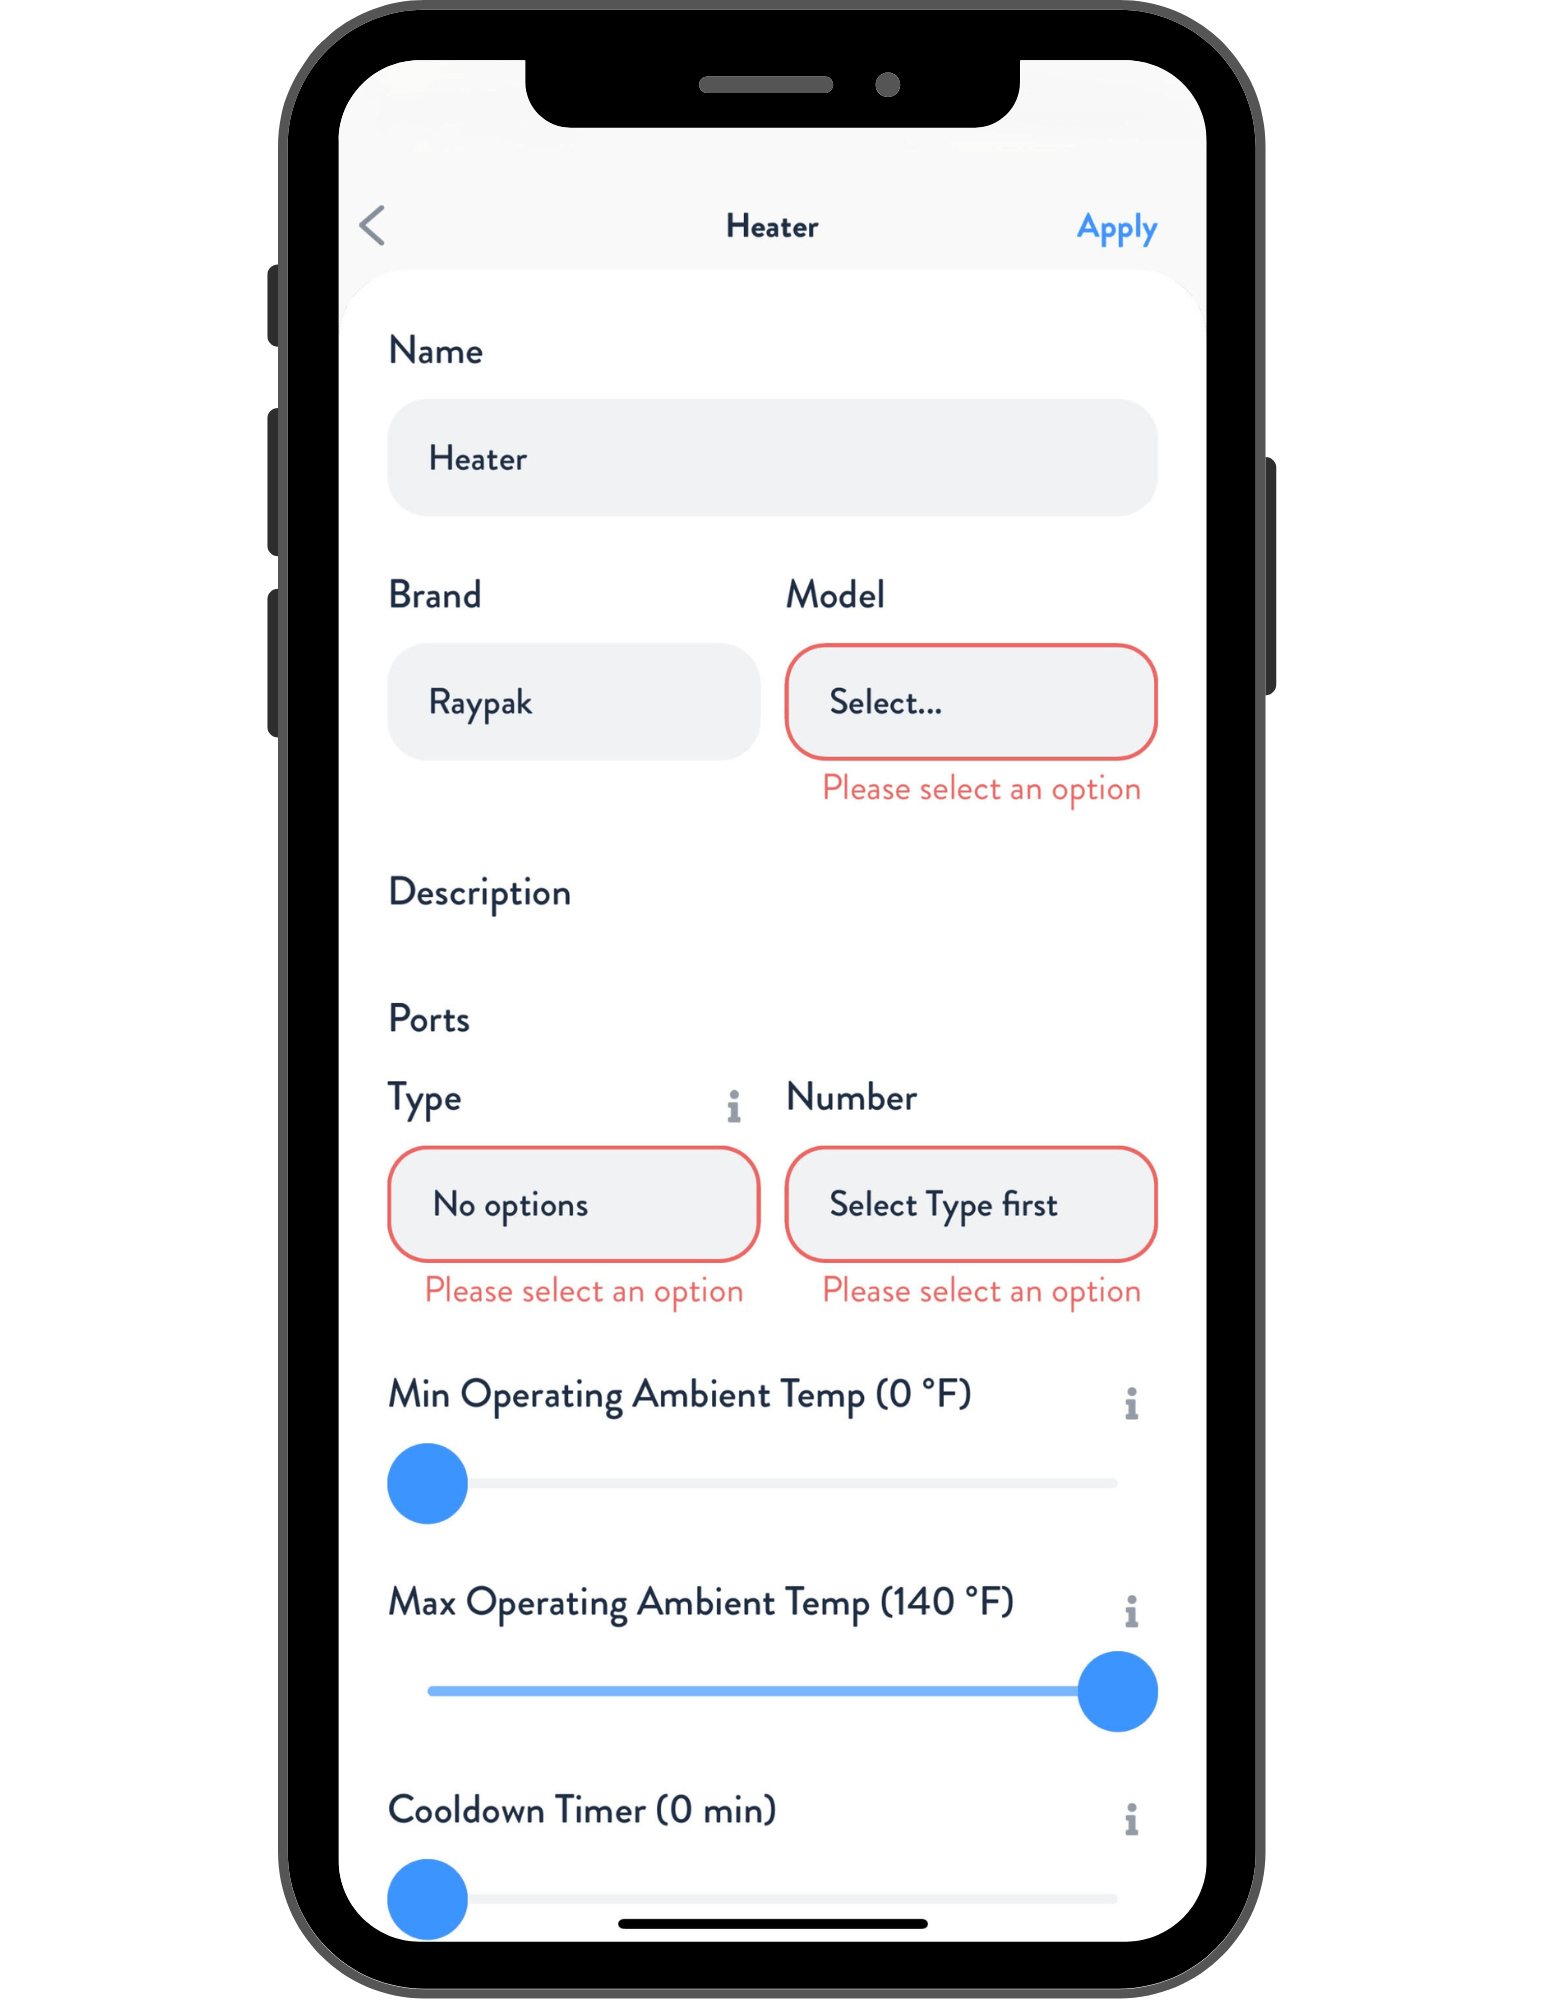
Next, choose Heater as Type and the Heater Port number for the heater. Press Apply, then navigate to the Flows tab and assign your heater to the appropriate flow. When finished, press Apply and Save.
Your Raypak Heater is now wired, programmed, and ready to use!