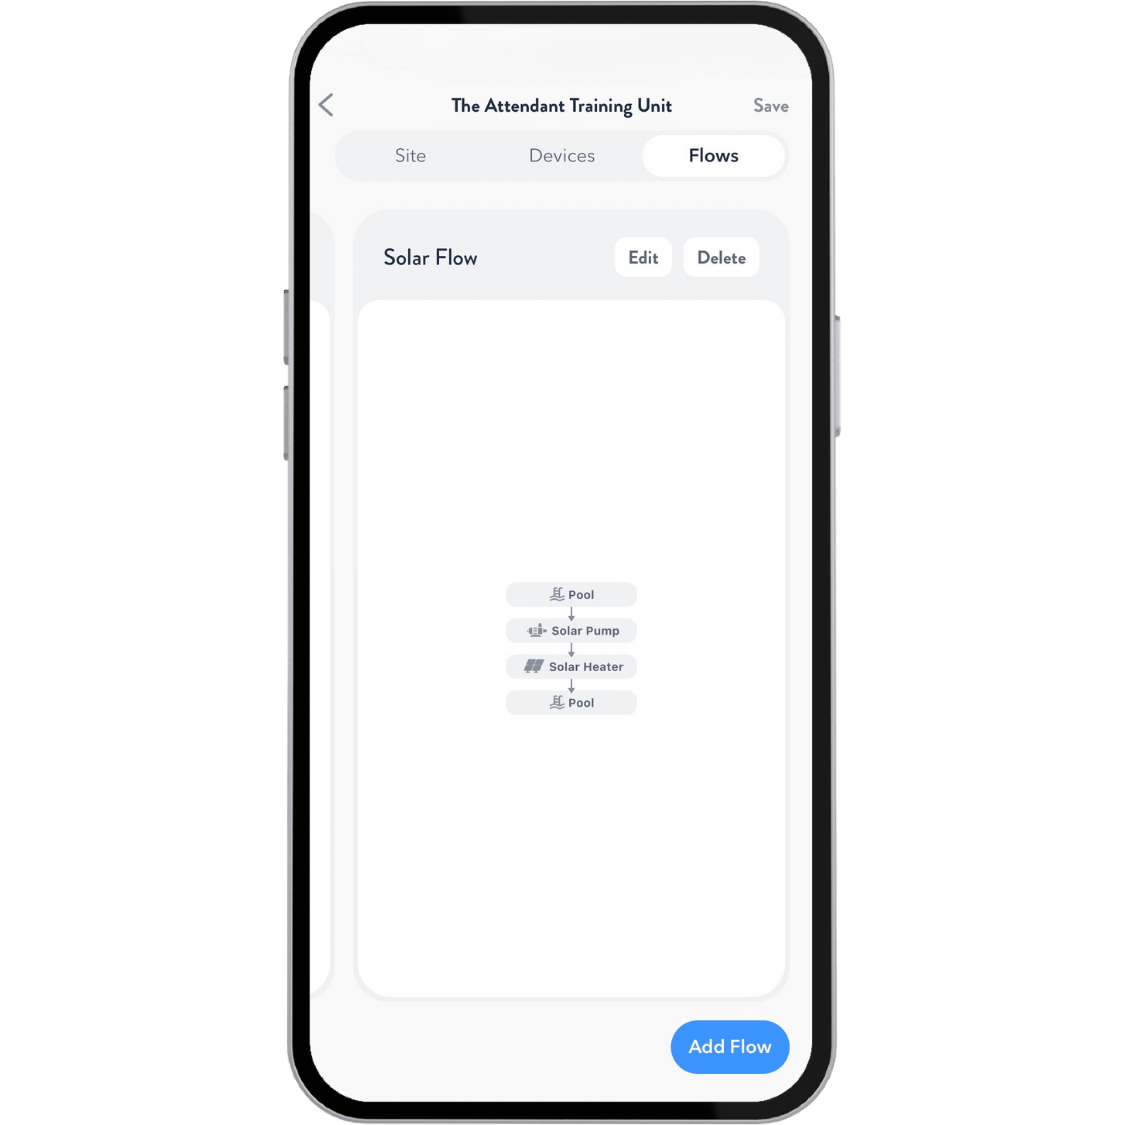
The Attendant can control a traditional solar pool-heating system by automatically routing water through the solar collectors when solar heat is available.
When solar heating is enabled, the Attendant monitors the pool temperature and available solar temperature. When conditions are favorable for heating, the Attendant opens the solar valve and routes water through the solar collectors. Once the desired temperature is reached, or solar heat is no longer available, the system automatically returns the valve to its normal position.
What You Will Need
Before configuring solar heating, make sure the solar system is properly installed and the required components are connected to the Attendant.
A typical installation will require:
- Solar Heating Panels
- Solar Valve and Actuator
- Water Temperature Sensor (10K)
- Solar Temperature Sensor (10K)
The solar temperature sensor should be installed in a location that accurately represents the temperature available at the solar collectors. The sensor is typically installed near the solar panels but not in direct sunlight.
Configure Solar Heating in the Attendant
Tap the Hamburger Menu ☰ icon.
Select Maintenance.
Tap Installer Mode to enter Installer Mode.
Add the Solar Temperature Sensor
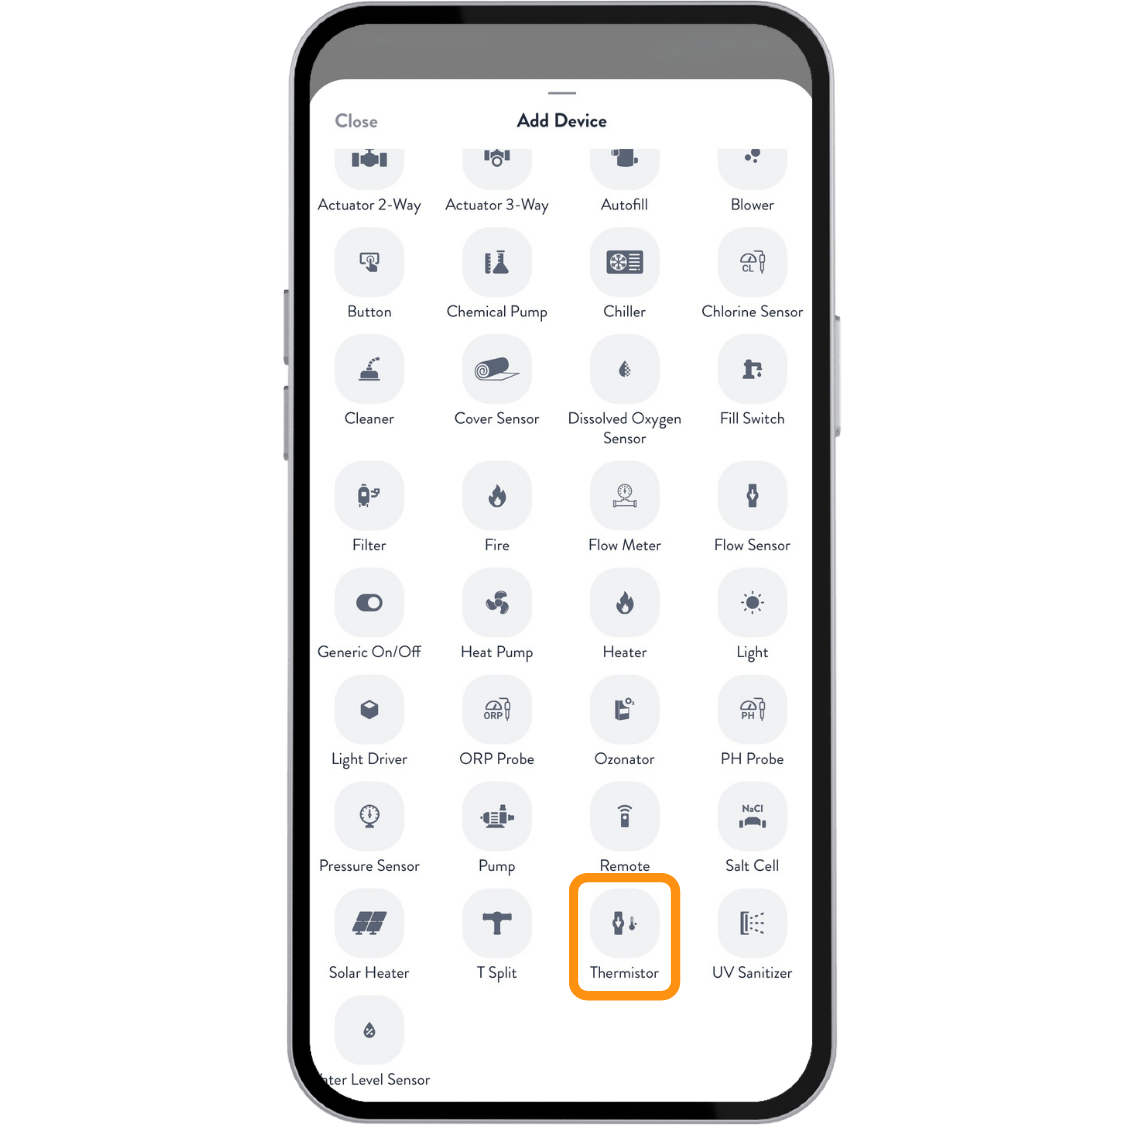
From the Devices tab, press the blue + button.
Select Thermistor.
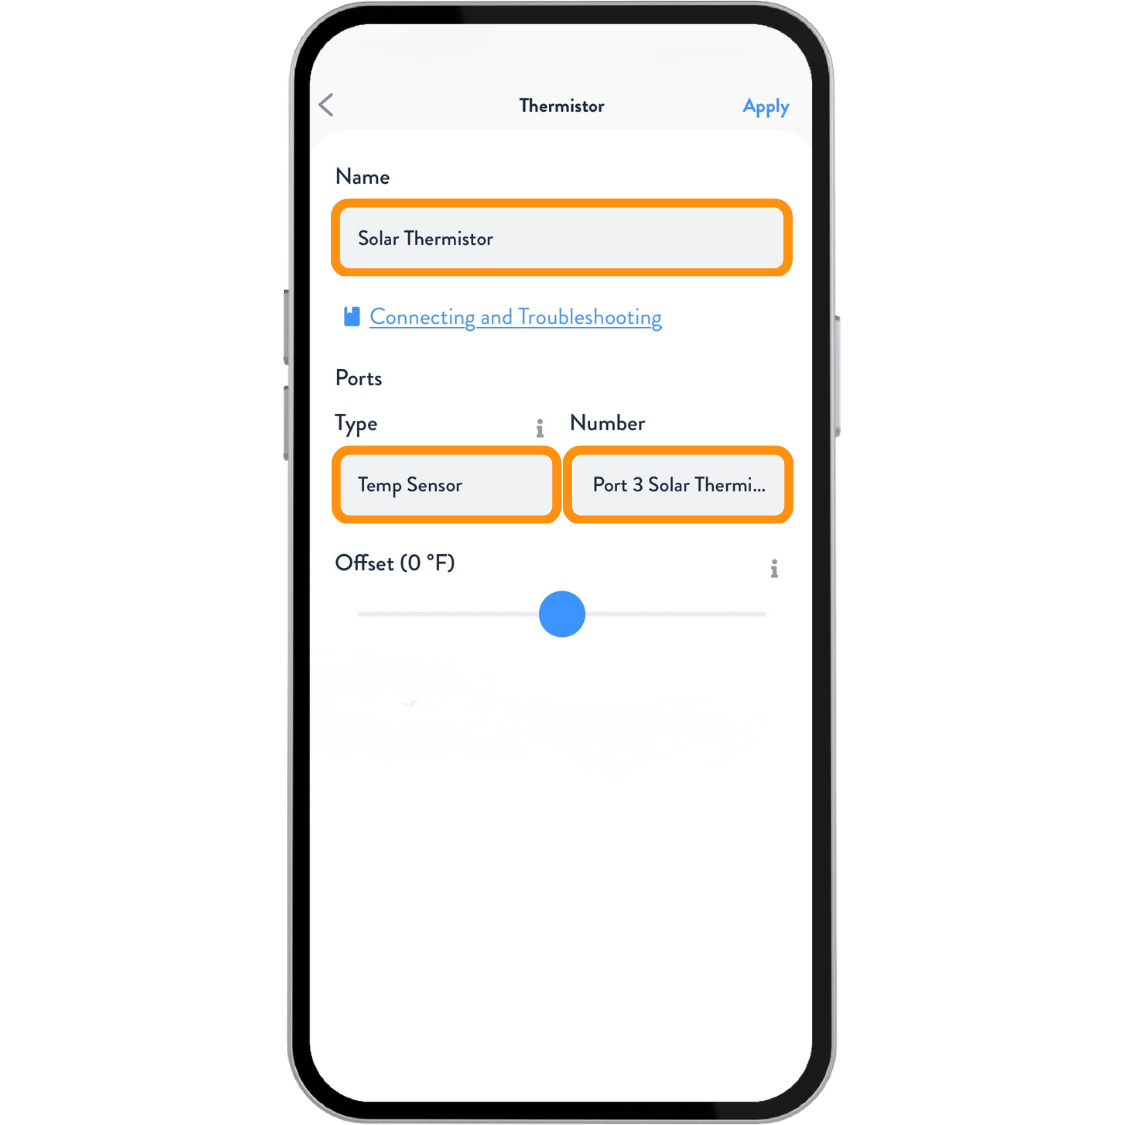
Change the name to Solar Thermistor, then select the input where the solar temperature sensor is wired.
Press Apply.
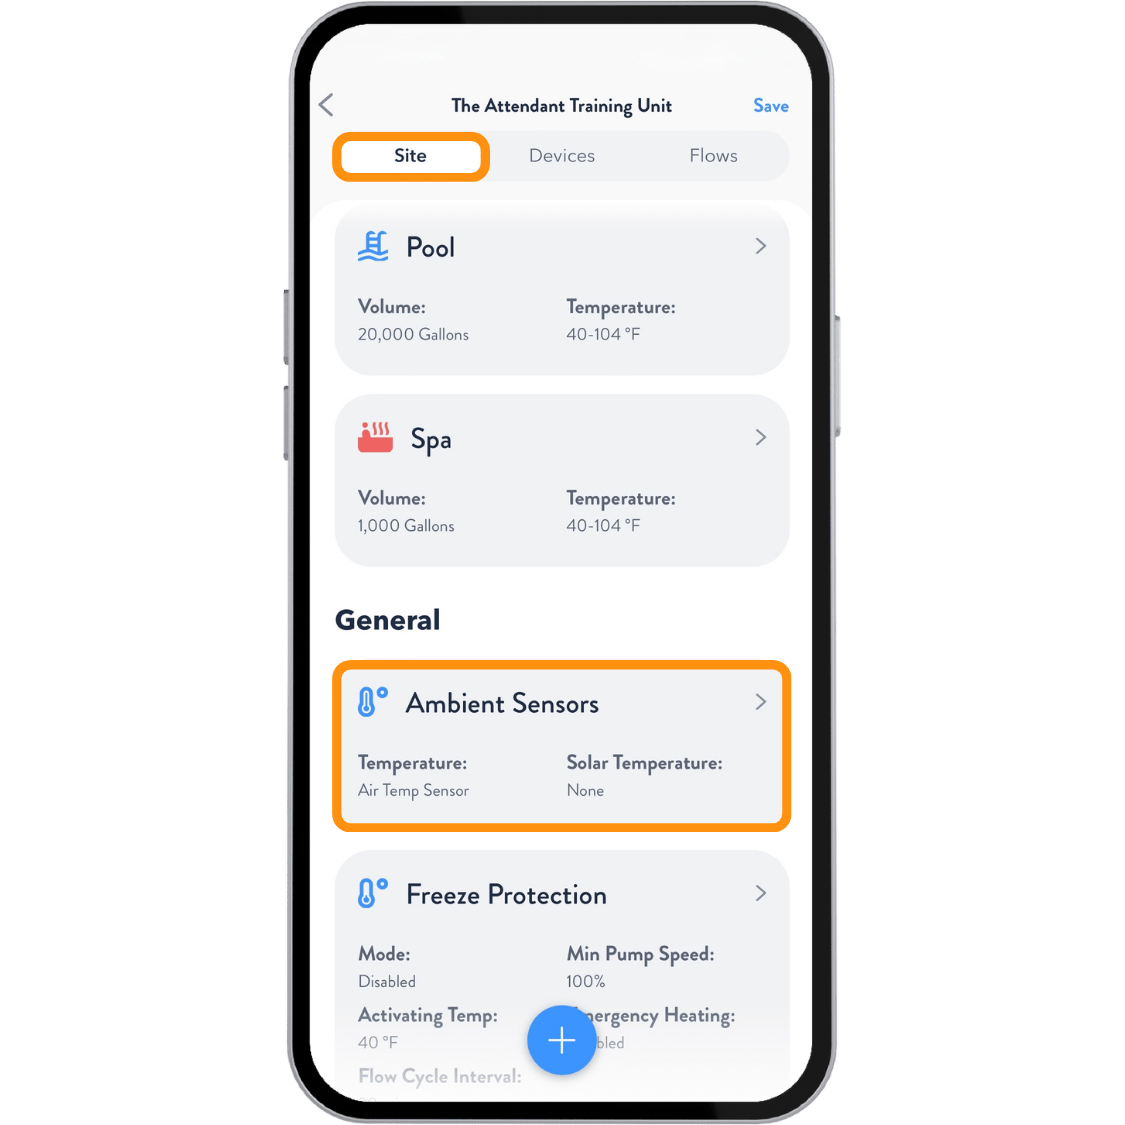
Next, tap Site at the top of the screen and scroll down to General.
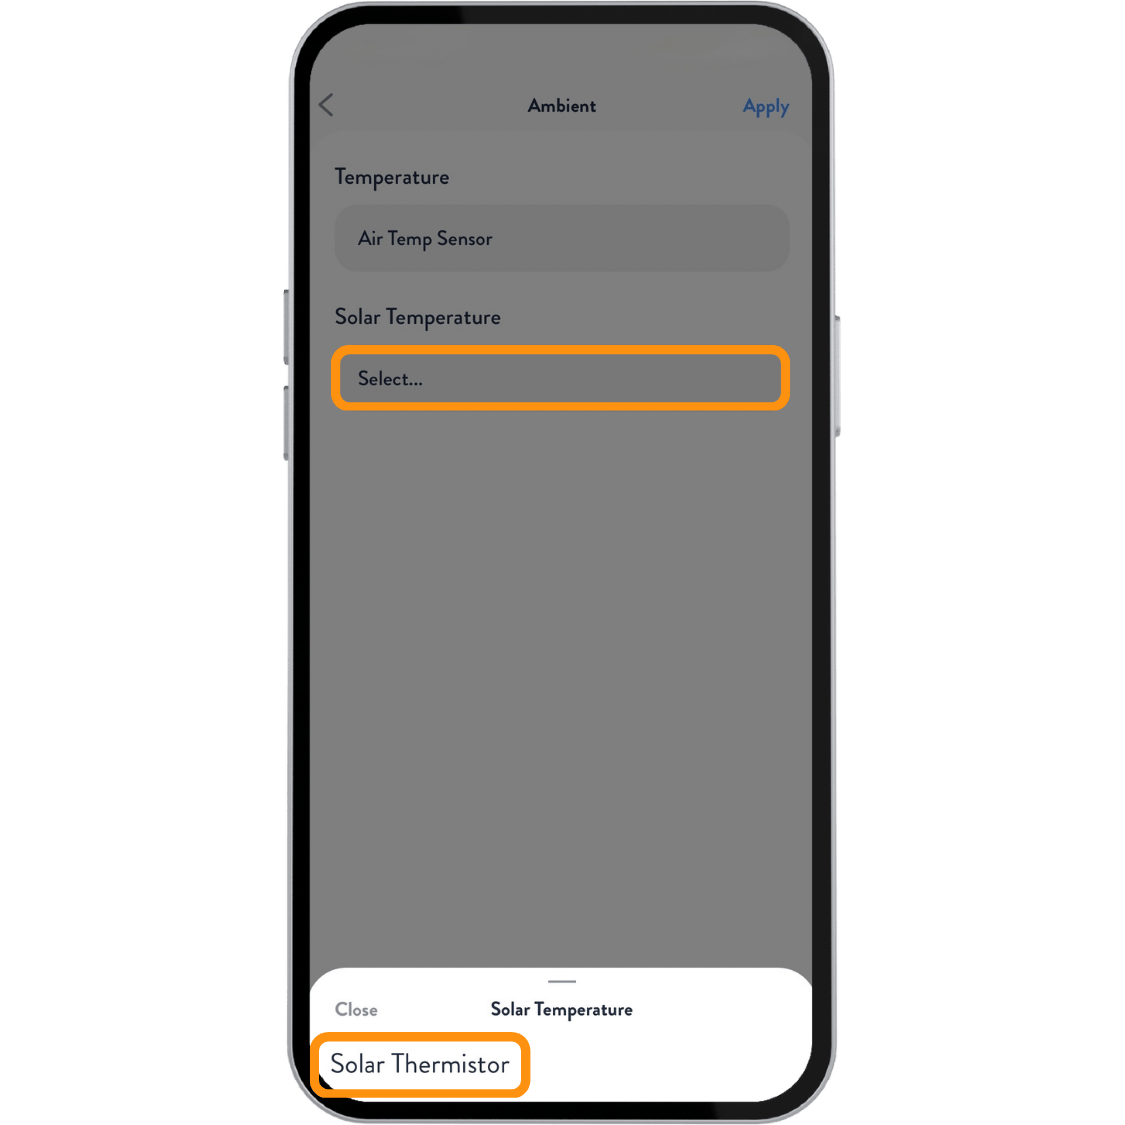
Tap the gray Ambient Sensors box.
Select Solar Temperature, then choose the Solar Thermistor you just added.
Press Apply, then Save.
Add the Solar Actuator
Navigate to the Flows tab and select Edit on the flow where the solar heating system is located.
Press the blue + button at the location in the flow where the solar three-way valve is installed.
Select Actuator 3-Way.
Change the name to Solar Actuator, enter the appropriate valve specifications, then select the port where the valve actuator is connected.
Press Apply.


Add the Solar Return
Press the blue + button at the location where the water returning from the solar collectors reconnects to the main plumbing.
Select T Split.
I typically rename this Solar Return so it is easy to identify in the flow.
Press Apply.


Add the Solar Heater
Now we can add the solar collectors to the system.
Press the blue + button immediately after the Solar Actuator.
Under New Devices, select Solar Heater.
Adjust the solar heater settings as needed, then press Apply.
Next, tap the newly added Solar Heater and select Connect To.
Select the Solar Return T Split you created earlier.
Press Apply.
Finally, press Apply again and then Save to save the completed flow configuration.


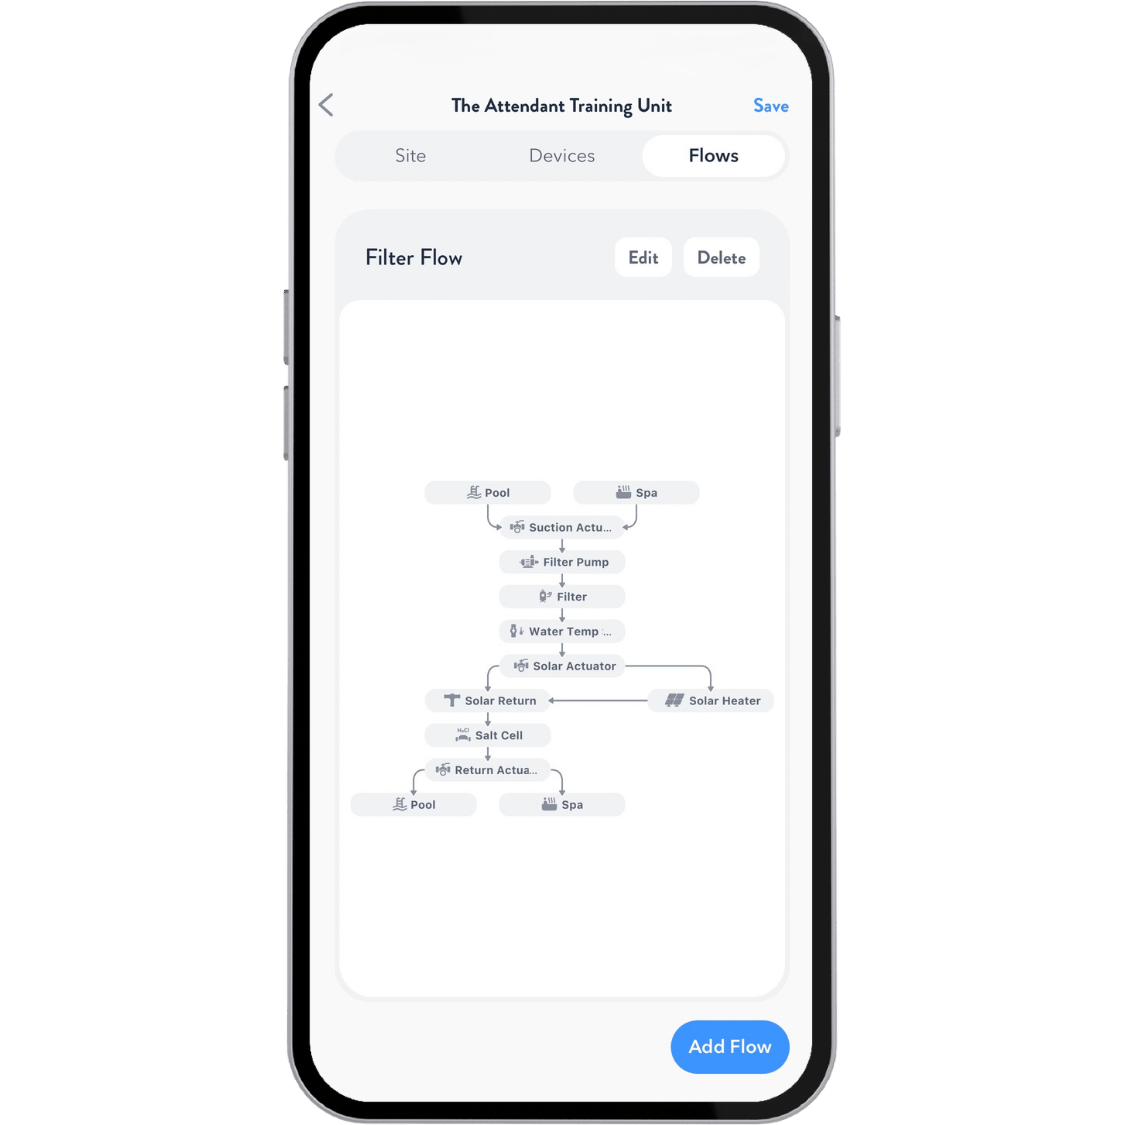
The final flow should look similar to the flow below.
Operating Solar Through the App
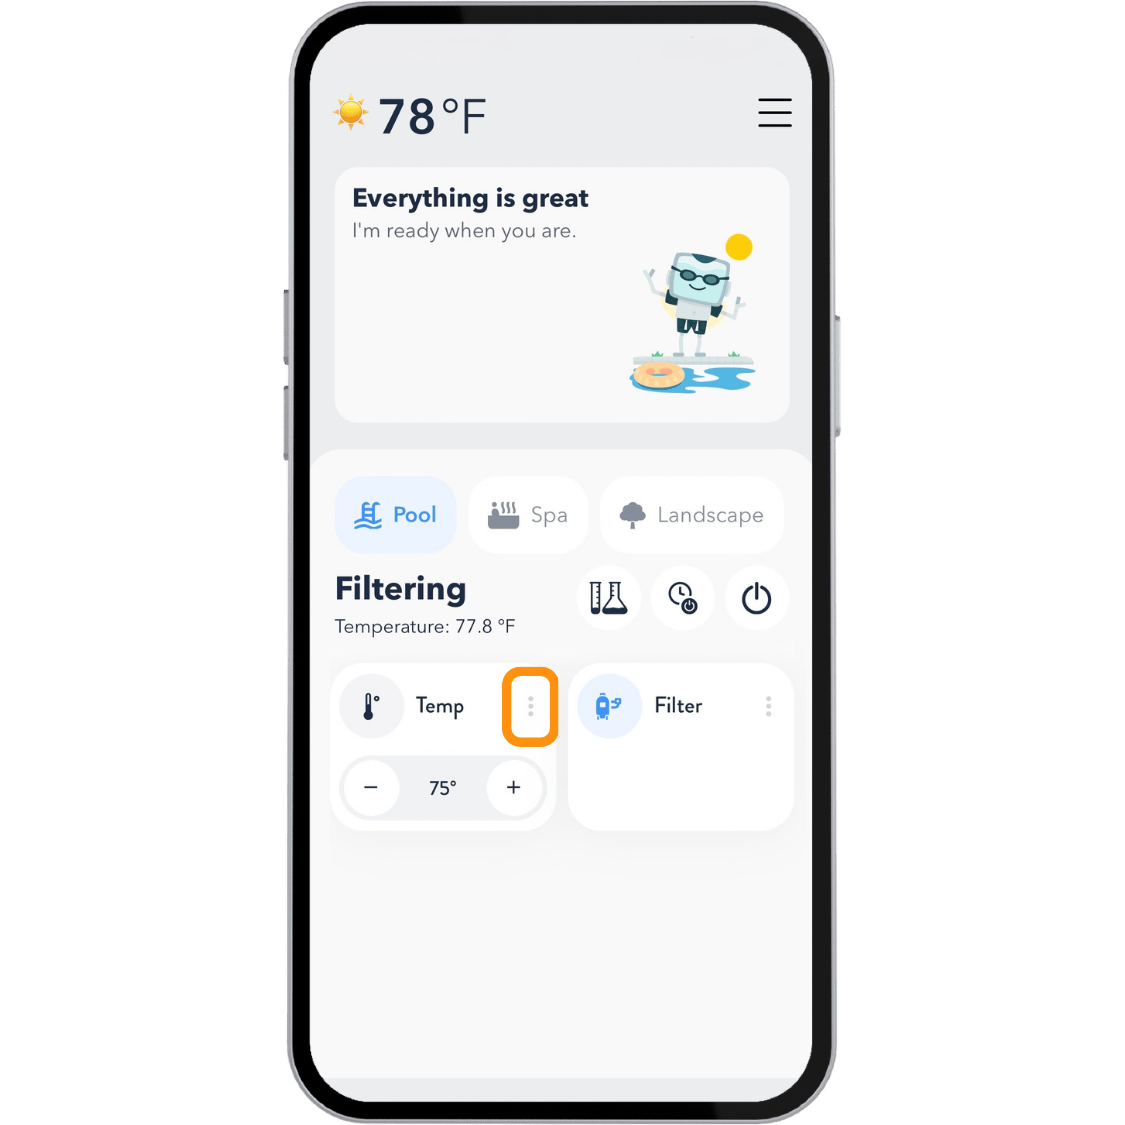
From the Home screen, locate the Temp button. To the right of the Temp button, tap the Meatball Menu ⋮ to access the temperature settings.
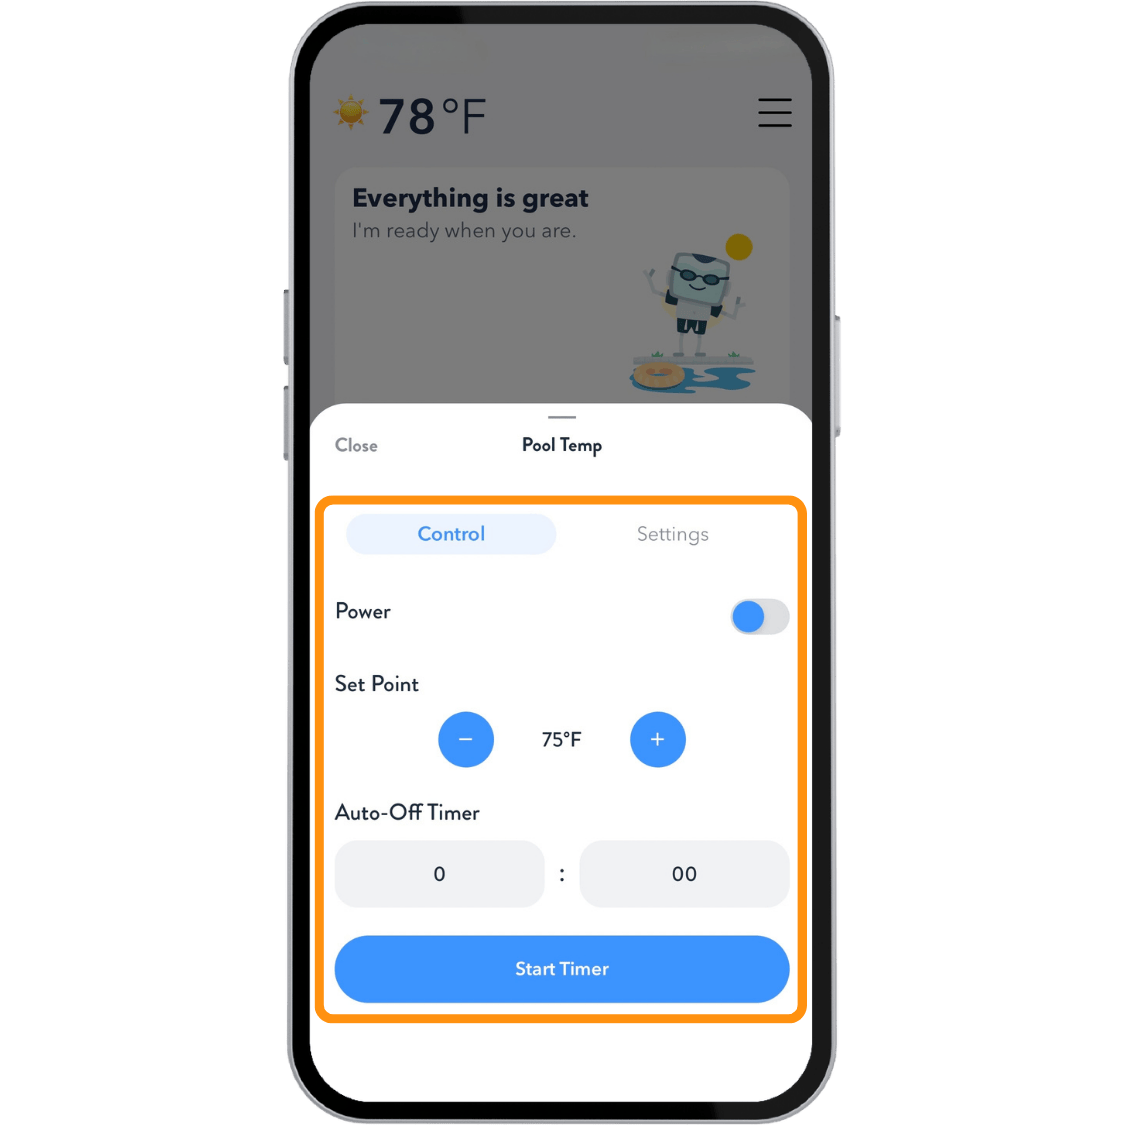
From the first settings screen, you can:
- Adjust the temperature Setpoint
- Select the Control Mode
- Choose the desired Heating Mode/Source
- Set an Auto-Off Time if you do not want the heating system to remain active indefinitely when it is manually turned on
Next, tap the Settings tab at the top of the screen to access the more advanced temperature settings.
Temperature Maintenance Threshold
For solar heating applications, you may want to increase the Temperature Maintenance Threshold to prevent the solar system from cycling on and off too frequently as the water temperature approaches the desired setpoint.
This setting can be adjusted based on the system and your preferences. Increasing the threshold allows for a wider temperature range before the Attendant calls for heat again, helping reduce unnecessary cycling of the solar valve.
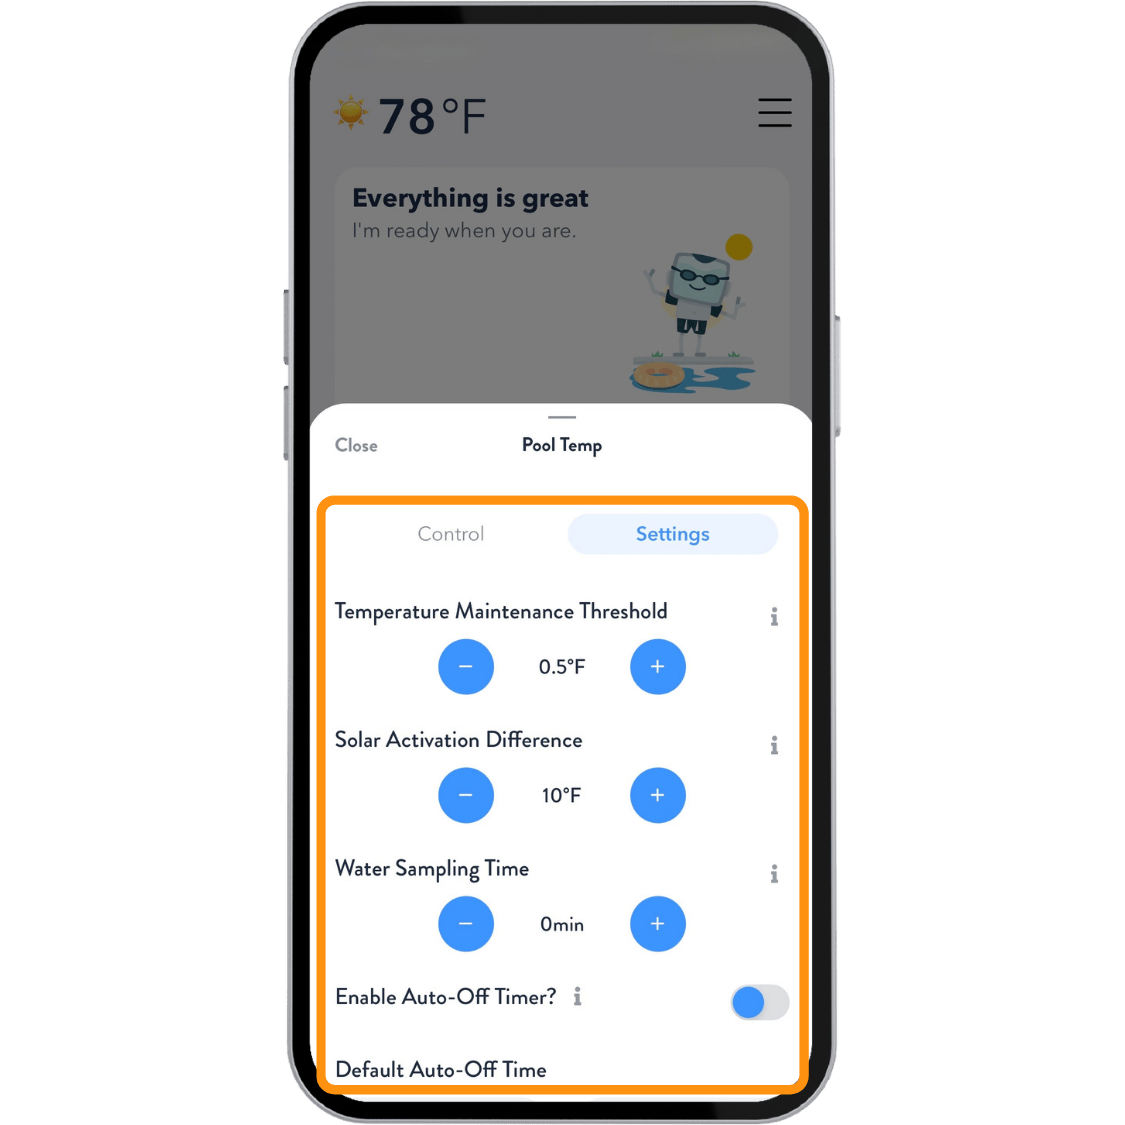
Solar Activation Difference
Another important setting for solar heating is Solar Activation Difference.
This setting controls the temperature difference required between the water temperature and the solar temperature sensor before the Attendant activates solar heating.
For example, if the Solar Activation Difference is set to 8°F, the solar temperature must be at least 8°F warmer than the water temperature before solar heating will activate.
A typical setting is between 6°F and 10°F, depending on the system and your preference.
A lower setting allows solar heating to activate with a smaller temperature difference, while a higher setting requires more available heat before water is routed through the solar collectors.
Once you have finished making your adjustments, press Close to return to the Home screen.
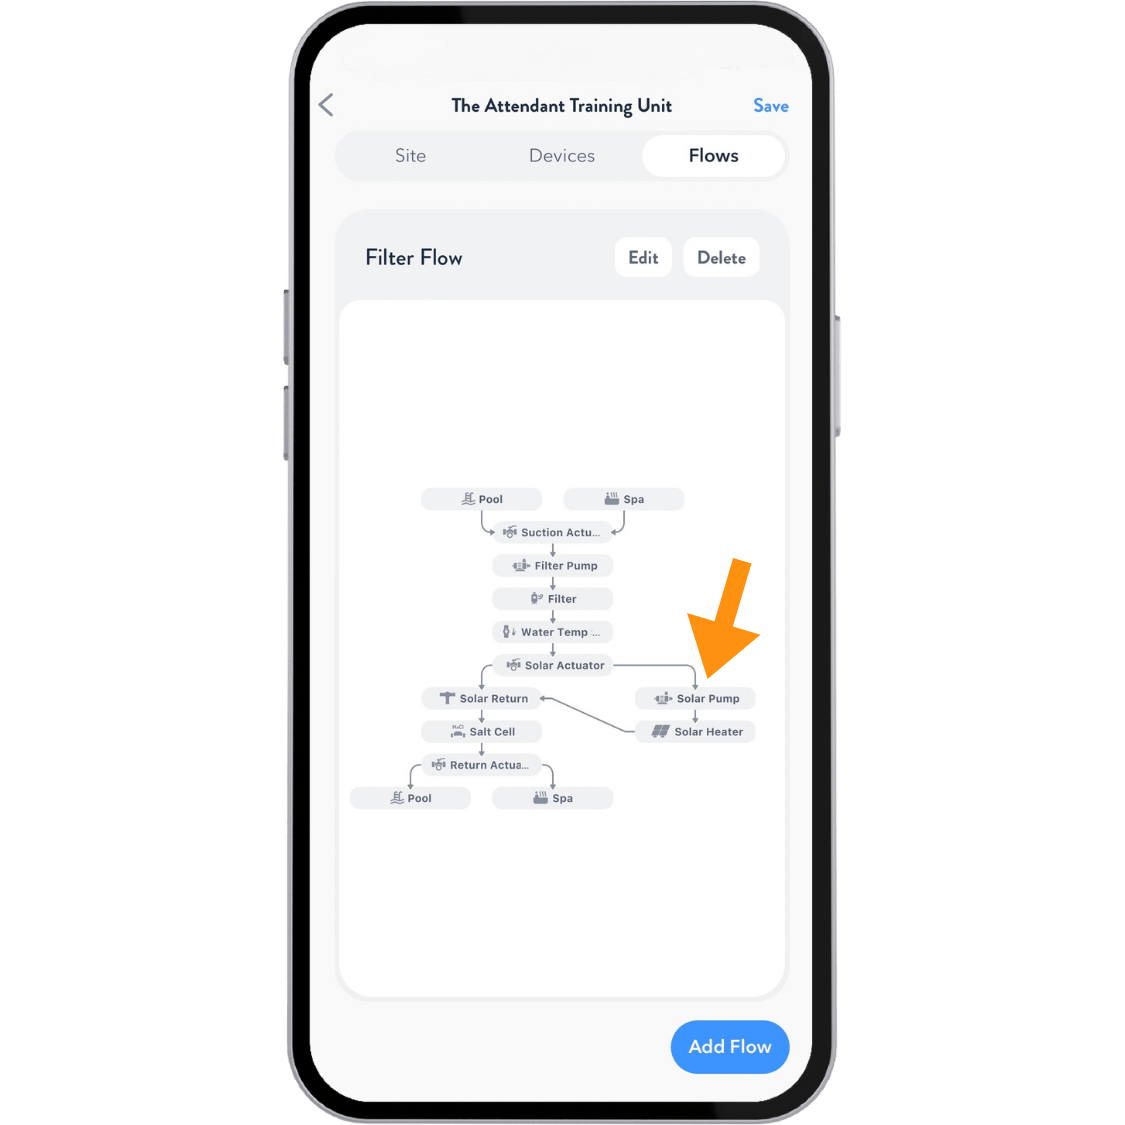
Attached Solar with Booster Pump
If your solar heating system uses a booster pump but follows the same plumbing configuration described above, the setup is very similar.
Simply add a Solar Booster Pump to the flow before the Solar Heater. This allows the Attendant to activate the booster pump whenever solar heating is called for.
The example below shows how the completed flow should be configured when using a Solar Booster Pump.
Separate Solar with Booster Pump
If your solar heating system does not follow the plumbing configuration described above, you will need to create a separate Flow for the solar system.
The example below shows how this type of solar configuration should be set up in the Attendant.
Important: When using a separate Flow for the solar system, the water temperature sensor must remain in the main filter Flow. Do not move the water temperature sensor into the new solar Flow.
Use the example below as a reference when building the additional solar Flow.