Installing the ESO3 Emergency Stop Switch with The Attendant
Required Parts and Tools
- Part # ESO3 (Relay Board and Stop Switch)
- Small needle nose pliers
The ESO3 Emergency Stop Switch provides a critical safety feature for pools and spas: a single button that immediately shuts down equipment in an emergency. When integrating this switch with The Attendant automation system, special attention must be given to relay polarity reversal to ensure proper operation.
Why Use an Emergency Stop Switch?
- Safety: Allows quick shutdown in the event of entrapment or other emergency.
- Compliance: Many jurisdictions require an E-Stop on commercial installations.
- Integration: When wired to The Attendant, the switch cleanly interrupts automation control quickly by removing power to the device.
Wiring the ESO3 to The Attendant
Relay Requirement
Any device that must be disconnected by the ESO3 must be powered through a relay—even if it normally wouldn’t be (e.g., a variable-speed pump).
Power Down (Before You Begin)
Shut off power to The Attendant and all connected equipment at the breaker. Verify zero voltage before working.
Reverse Relay Polarity (Required for ESO3)
Identify the relay circuit
- Locate the relay you want the ESO3 to control.
- Unplug that relay connector from The Attendant board.
Reverse the polarity
- Using a small pair of needle-nose pliers, carefully grip the white plastic socket on The Attendant board (do not pull on the metal pins).

- Gently pull the socket straight out of the board.
- Rotate the socket 180° and carefully reinsert it, ensuring the pins slide smoothly into the socket without bending.
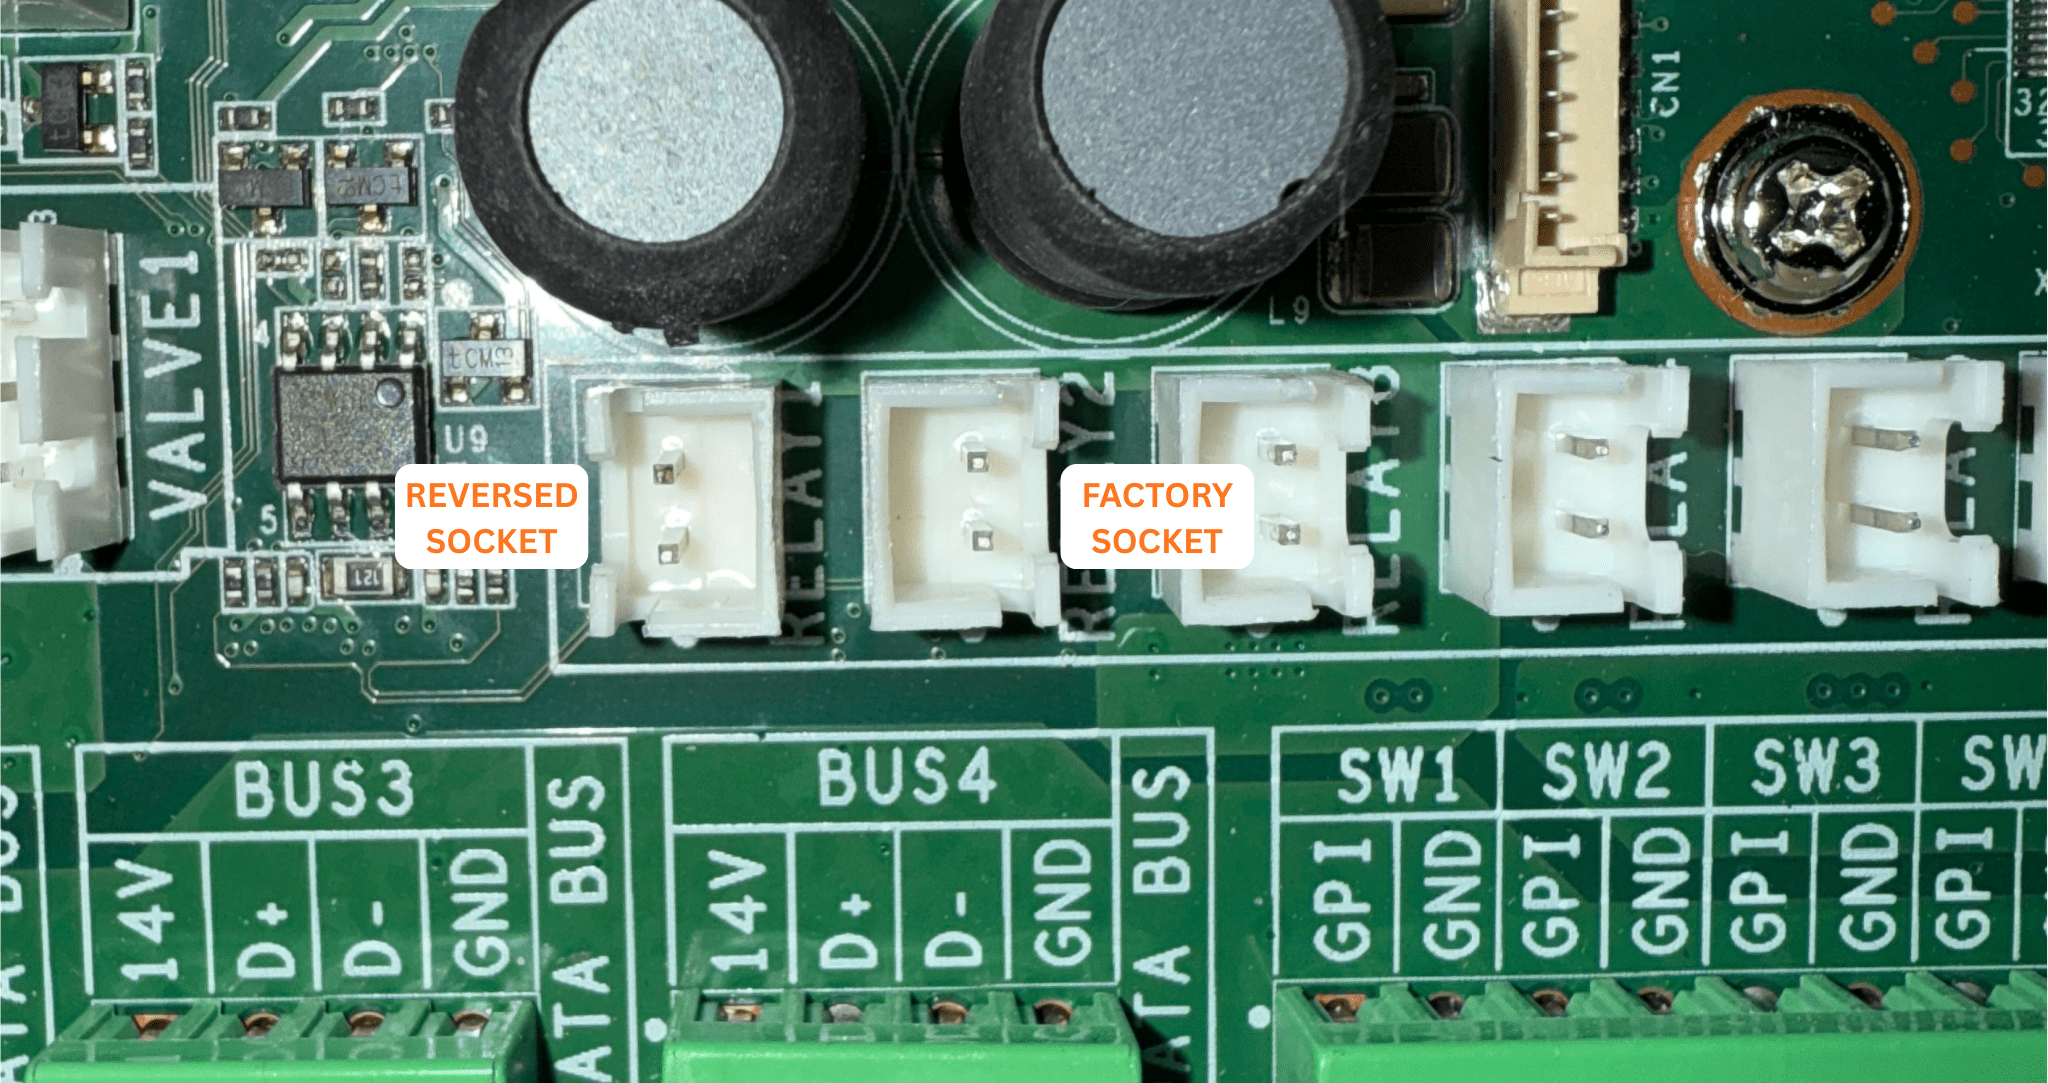
- This reverses the relay polarity.

Reconnect Wiring
- Connect the patch wire between The Attendant and the ESO3 board.
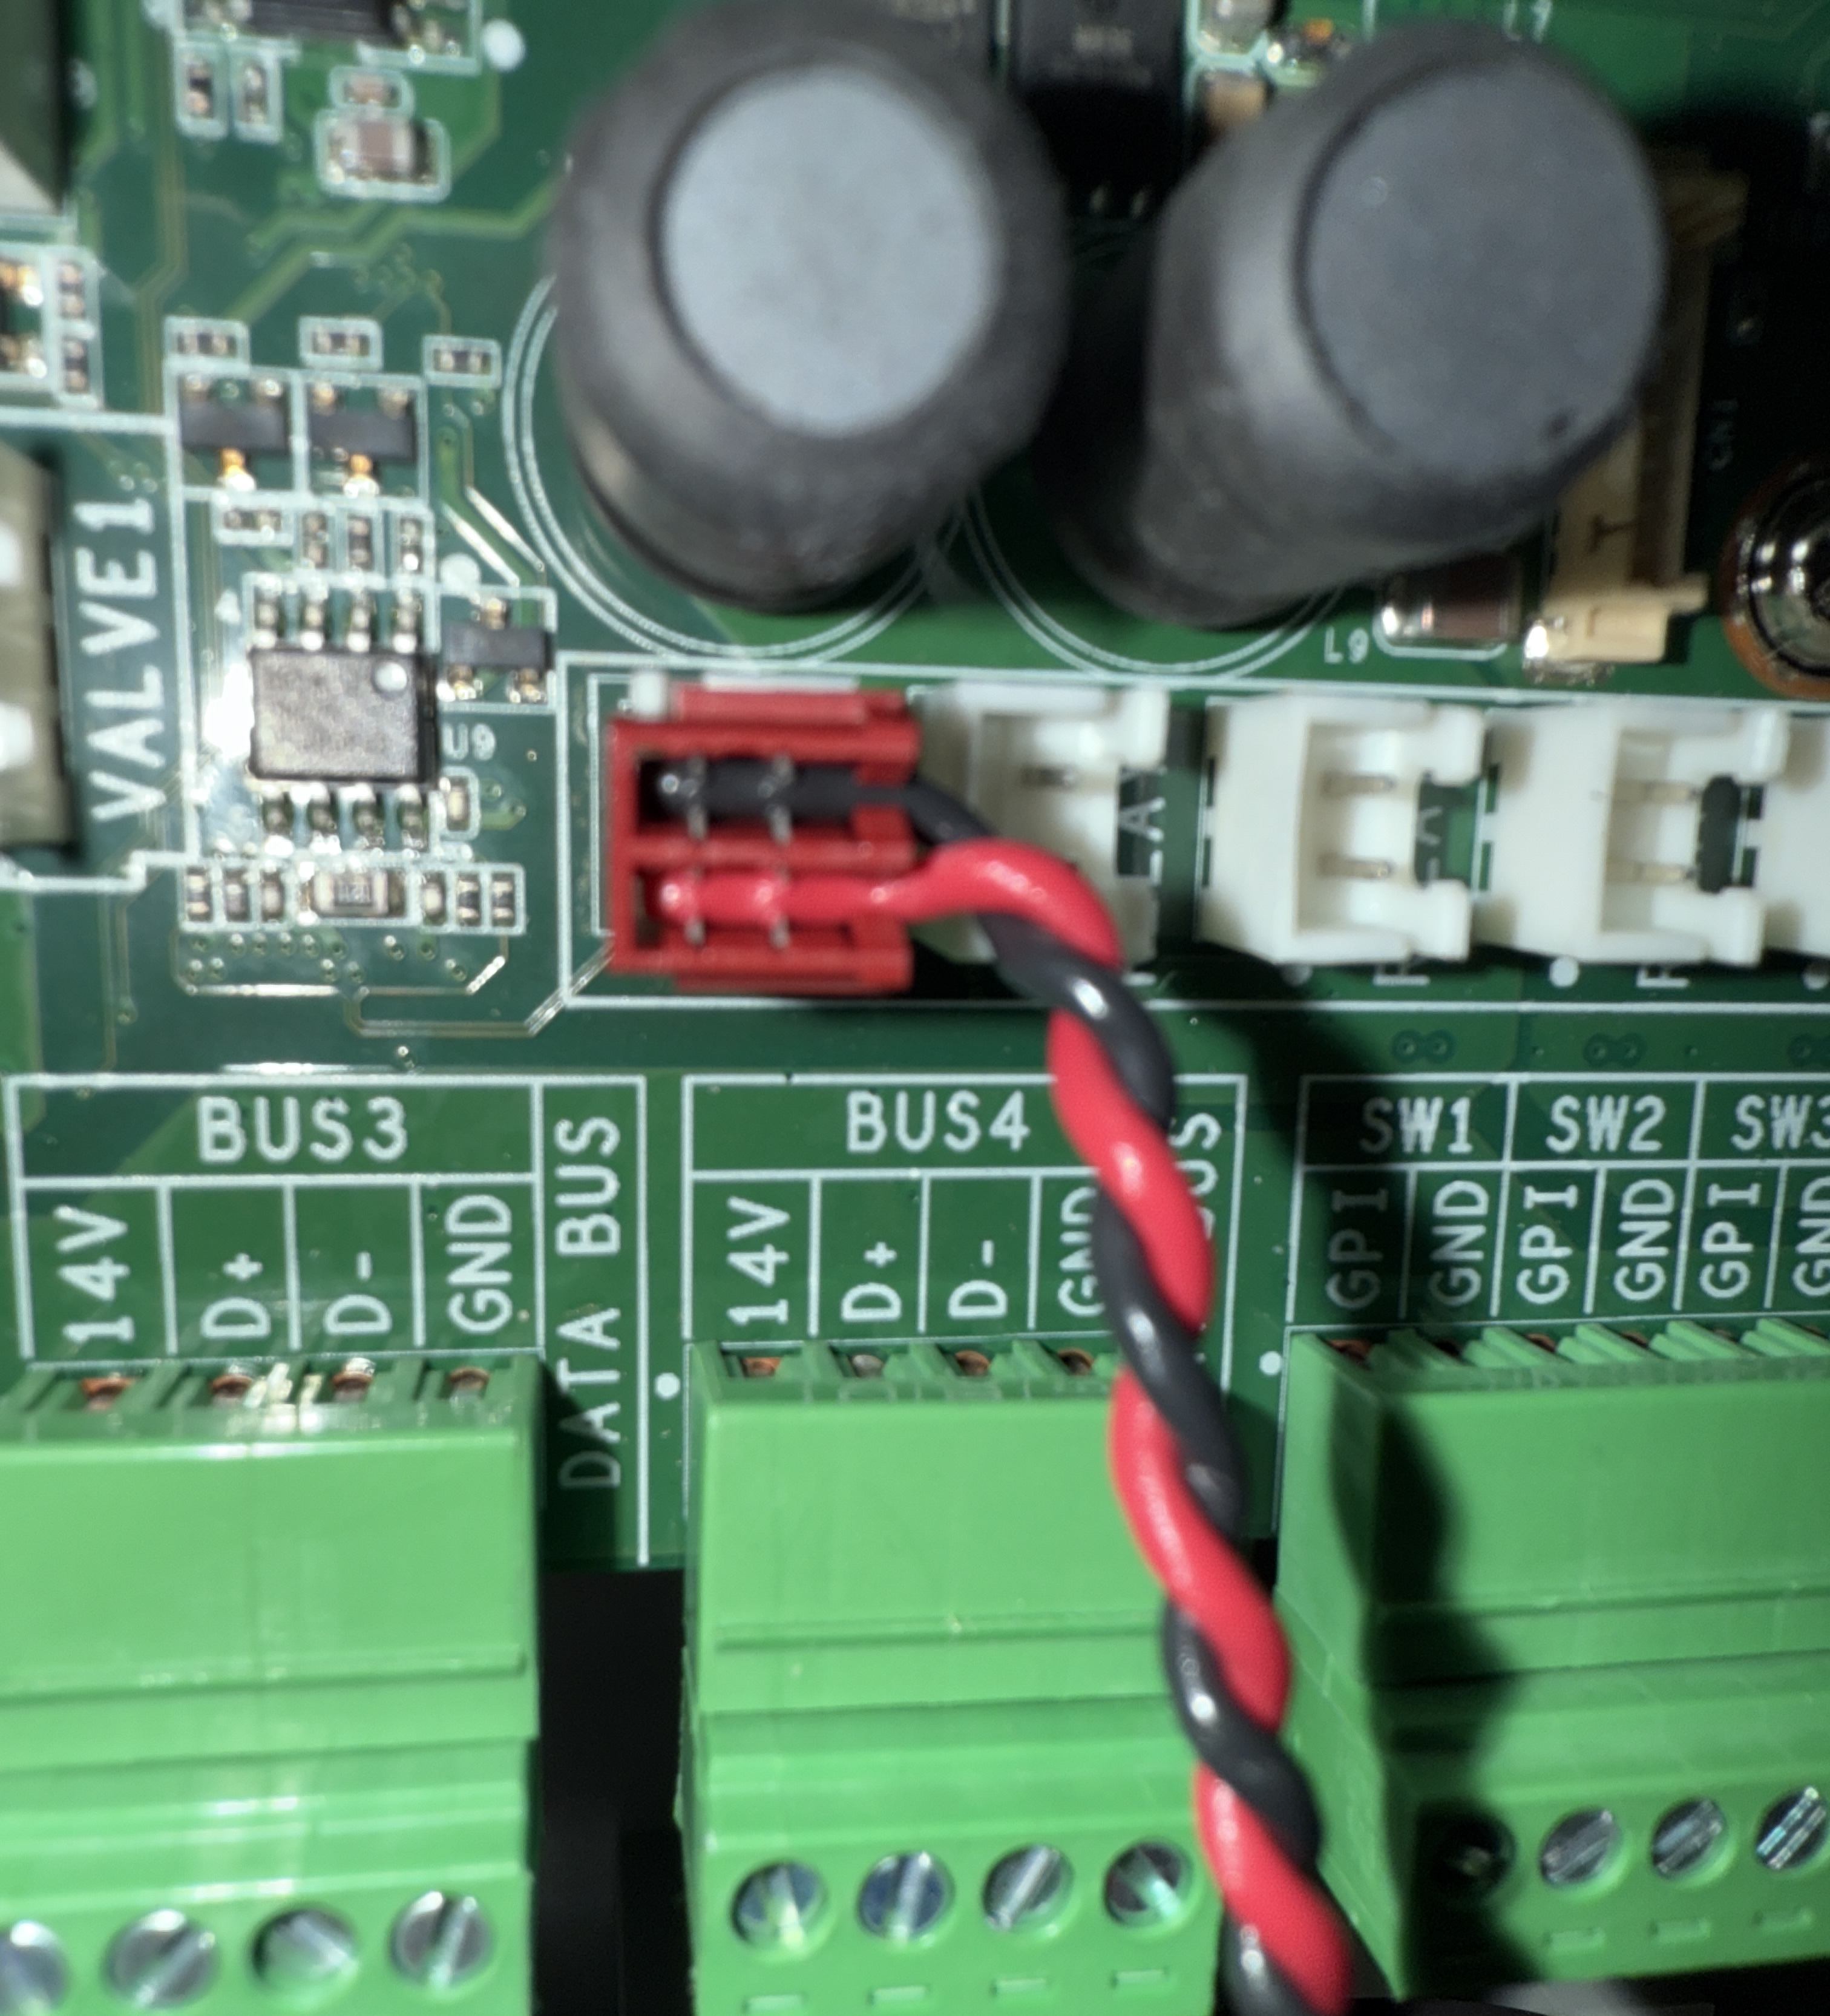
- Plug the relay connector into the corresponding socket.
- Complete the remaining wiring for the Emergency Stop Switch per the ESO3 instructions.

Programming The Attendant’s Power Ports
When using the ESO, all equipment must be powered through a High Voltage Relay. In some cases, when programming this equipment in The Attendant, the system will only prompt you to select the communication port it is connected to.
To ensure proper operation, you must also program a power port that activates the relay whenever the selected equipment is turned on. Follow the steps below to configure this.
1) Enter Installer Mode
- Open The Attendant app.
- Tap the hamburger menu ☰.
- Go to Maintenance → Installer Mode.
- Choose your entry method and tap Enter Installer Mode.
2) Select the Equipment
- Go to the Devices tab.
- Tap the > on the piece of equipment you want to control
3) Enable the Power Port
- In the equipment settings screen, scroll to the bottom.
- Slide the Power Port toggle ON.
4) Choose Relay & Port Number
- Set Power Type to Relay.
- Select the Relay Port Number (e.g., Port 1).
5) Save
- Tap APPLY, then SAVE.
6) Quick Test
- From the app, turn the equipment ON.
- Press the ESO to confirm everything shuts down immediately.
- Restore and retest normal operation.