The Chemistry Board is the connection between the pH and ORP probes and the main Attendant board. It is located underneath the bottom cover on the right side of the controller box just under the power supply transformer. This is an optional add-on to The Attendant which enables Chemistry Management for your pool and spa.
The location of the Chemistry Board in relation to the transformer and main board:

Installing the Chemistry Board
If you’ve purchased the Chemistry Board after initially installing The Attendant, you will need to follow these instructions to properly install your new add-on.
Preparation
Prior to installation, ensure that you have the following available:
- The Chemistry Board itself
- 2 M3 mounting screws (included with the kit)
- 2 communication wires to connect the Chemistry Board to the main board of The Attendant (included with the kit)
- #2 Phillips screwdriver
Installation
SHUT OFF ALL POWER to The Attendant.
Prior to mounting the Chemistry Board, carefully install the two communication cables provided with the Chemistry Board kit into the connectors as shown:


The 2-wire cable is placed into the J5 connector, and the wider, 15-wire cable is placed into the Expansion Bus connector.
On The Attendant, loosen the mounting screws on the bottom cover and remove the cover.
Locate the Chemistry Board mounting pillars on the top right side of the compartment.

Install the Chemistry Board by gently placing the board over the area and holding it in place while inserting and tightening the mounting screws (included). Be careful not to over-tighten the screws!
Once the Chemistry Board is securely fastened to the mounting pillars, you can take the next steps of connecting the communication wires to the main board.
Loosen the mounting screws on the top cover and lower it down from the top. Note: the cover swings downward on a hinge. The top cover should not be removed.
Route both of the wires from the Chemistry Board under the top cover and between the center pillar and the transformer. See the following image for guidance.

Attach the 15-wire cable to the CN5/Expansion connector on the upper-right side of main board.


The 2-wire cable should be fed down and attached to the GPIO1 connector.
DO NOT ATTACH THE 2-WIRE TO ANY OF THE RELAY PORTS – USE ONLY THE GPIO1 CONNECTOR


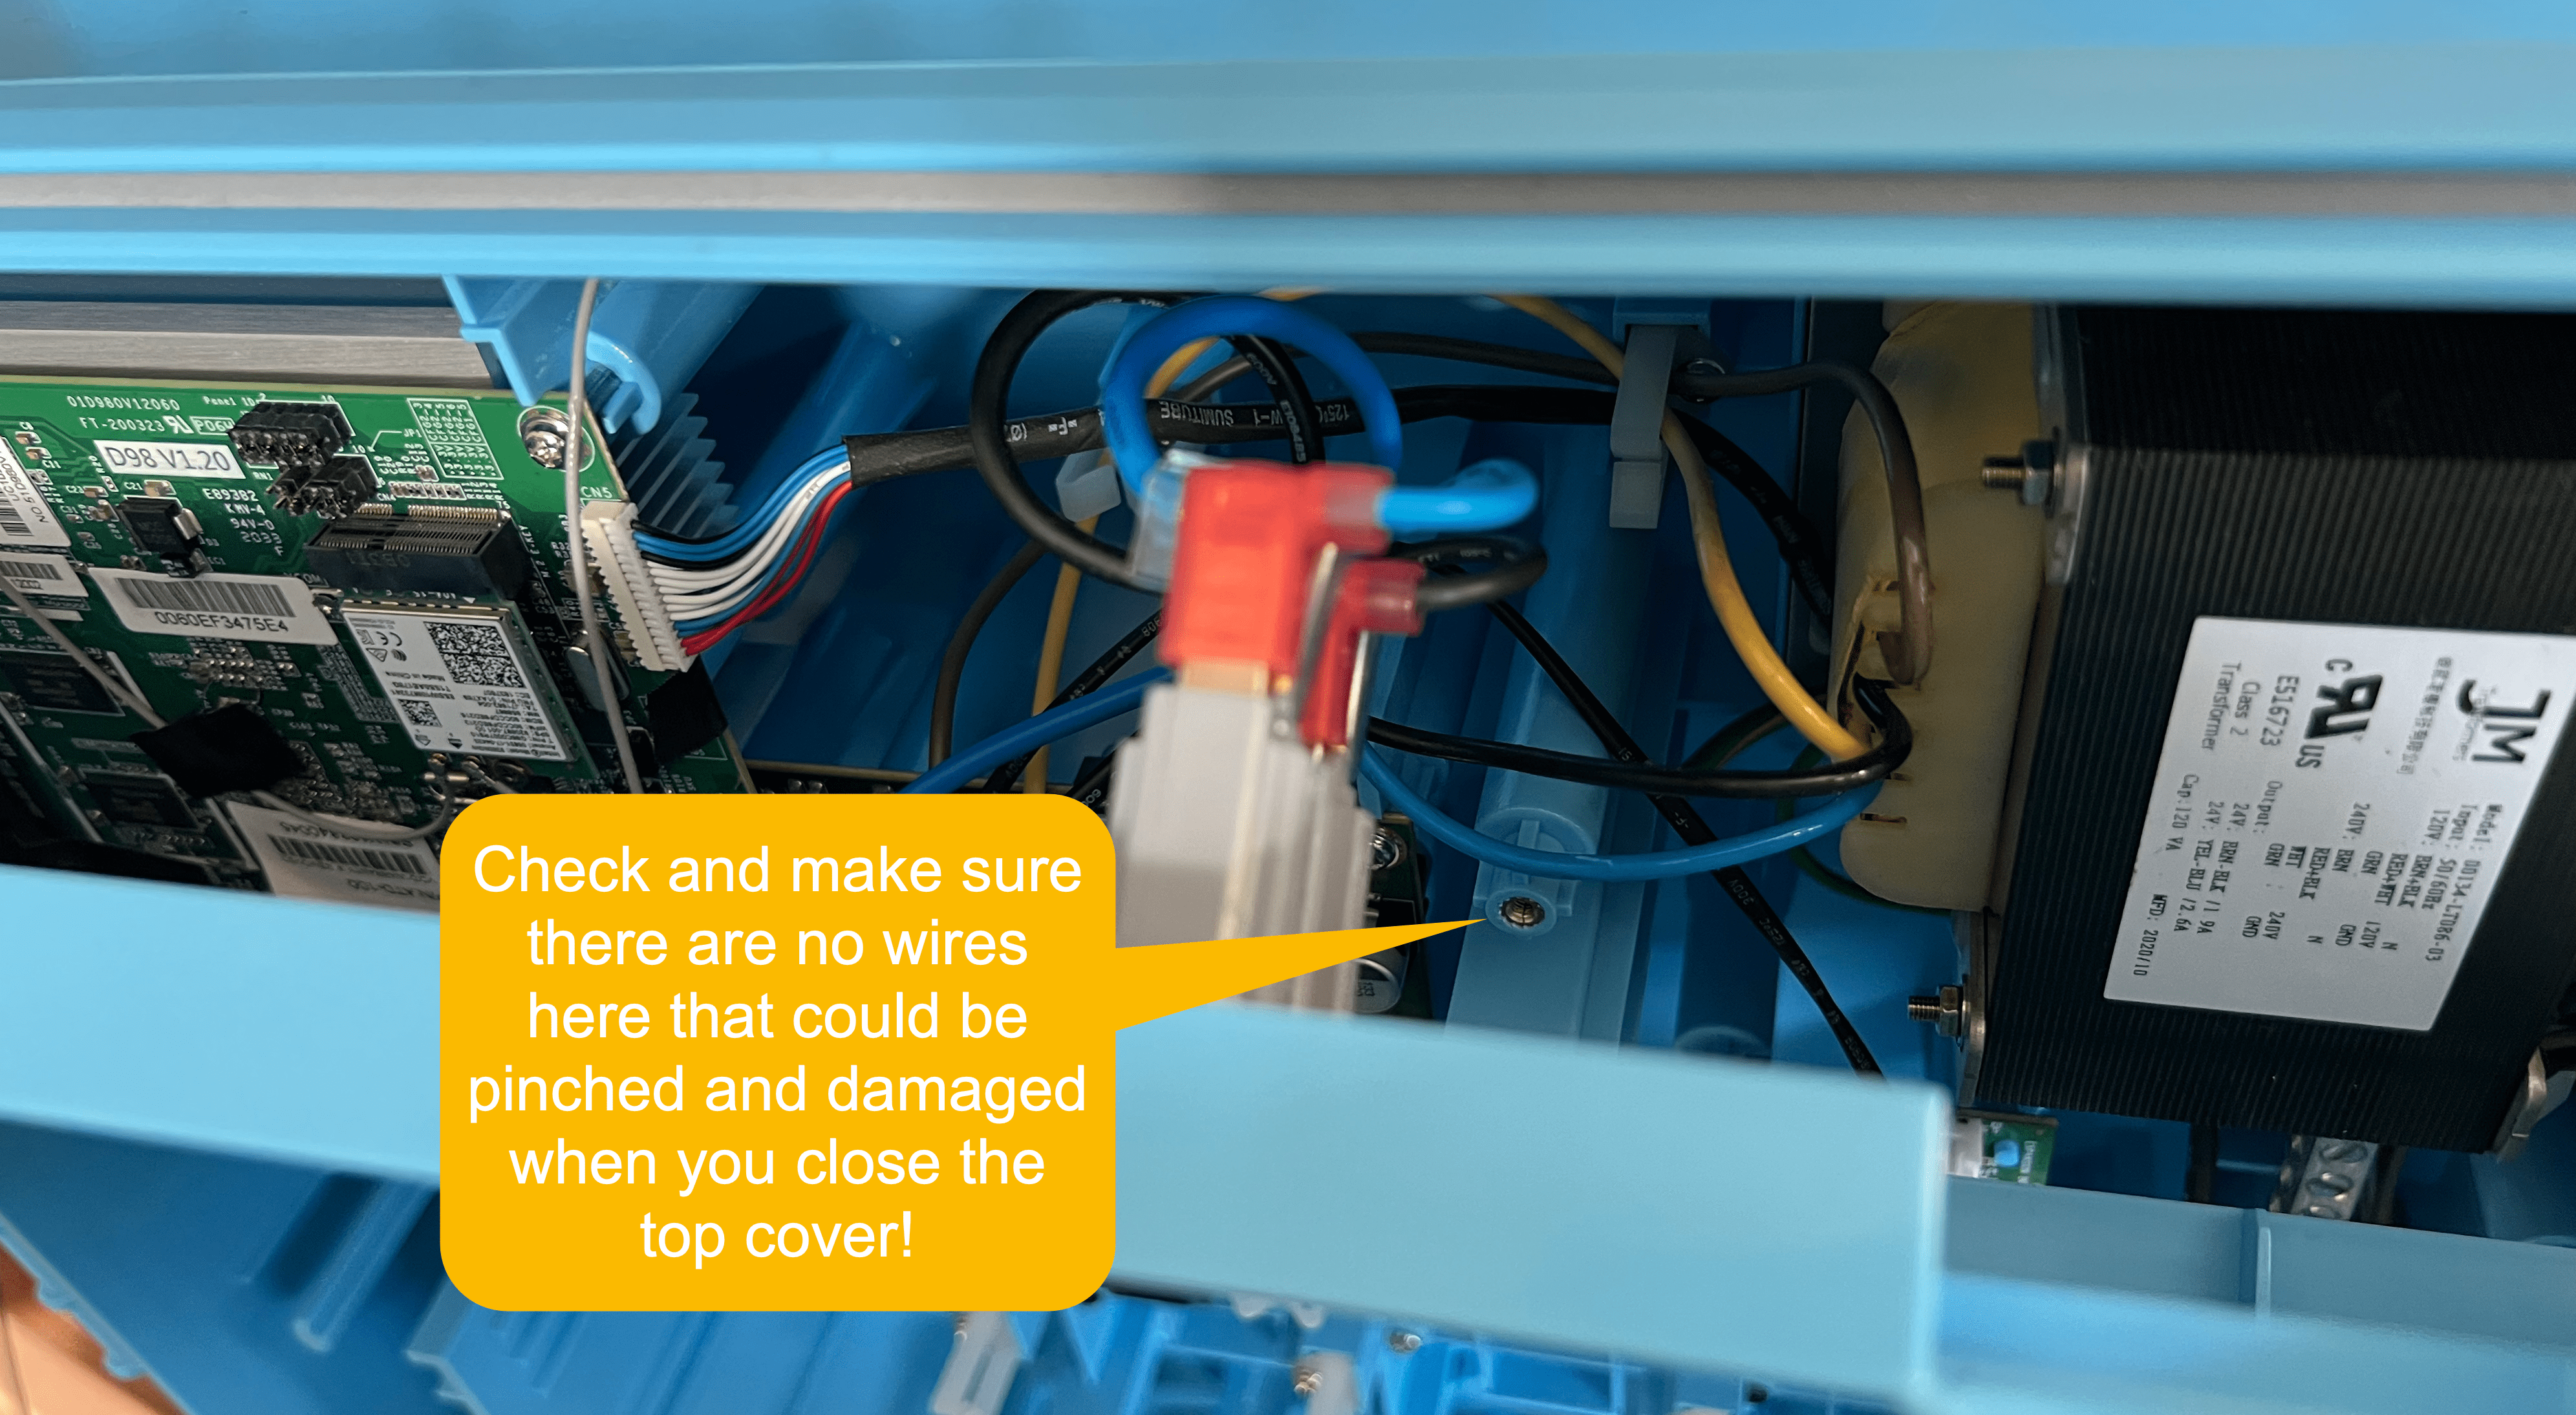
Once you’ve completed connecting both wires, it’s time to close up the top portion of The Attendant and fasten it down.
When swinging the top cover back into place, be sure to avoid pinching wires between the cover and the center pillar.
Reattach the bottom cover and fasten it.
Once that’s complete you can power the system back on and begin the probe installation procedure.